Leopard print nails live or die on one detail: real leopard spots are not solid blobs, they’re broken rings. A dark C-shape or a pair of crescents around a slightly warmer centre. Once you paint them that way instead of as dots, the whole thing stops looking like a craft project and starts looking like fur.
Here are 22 leopard print nail designs from a single accent nail to full print, plus the two-step spot technique, the colour pairings that avoid costume territory, and how leopard differs from cheetah if a tech asks. For the wider category, my nail art ideas post covers more.
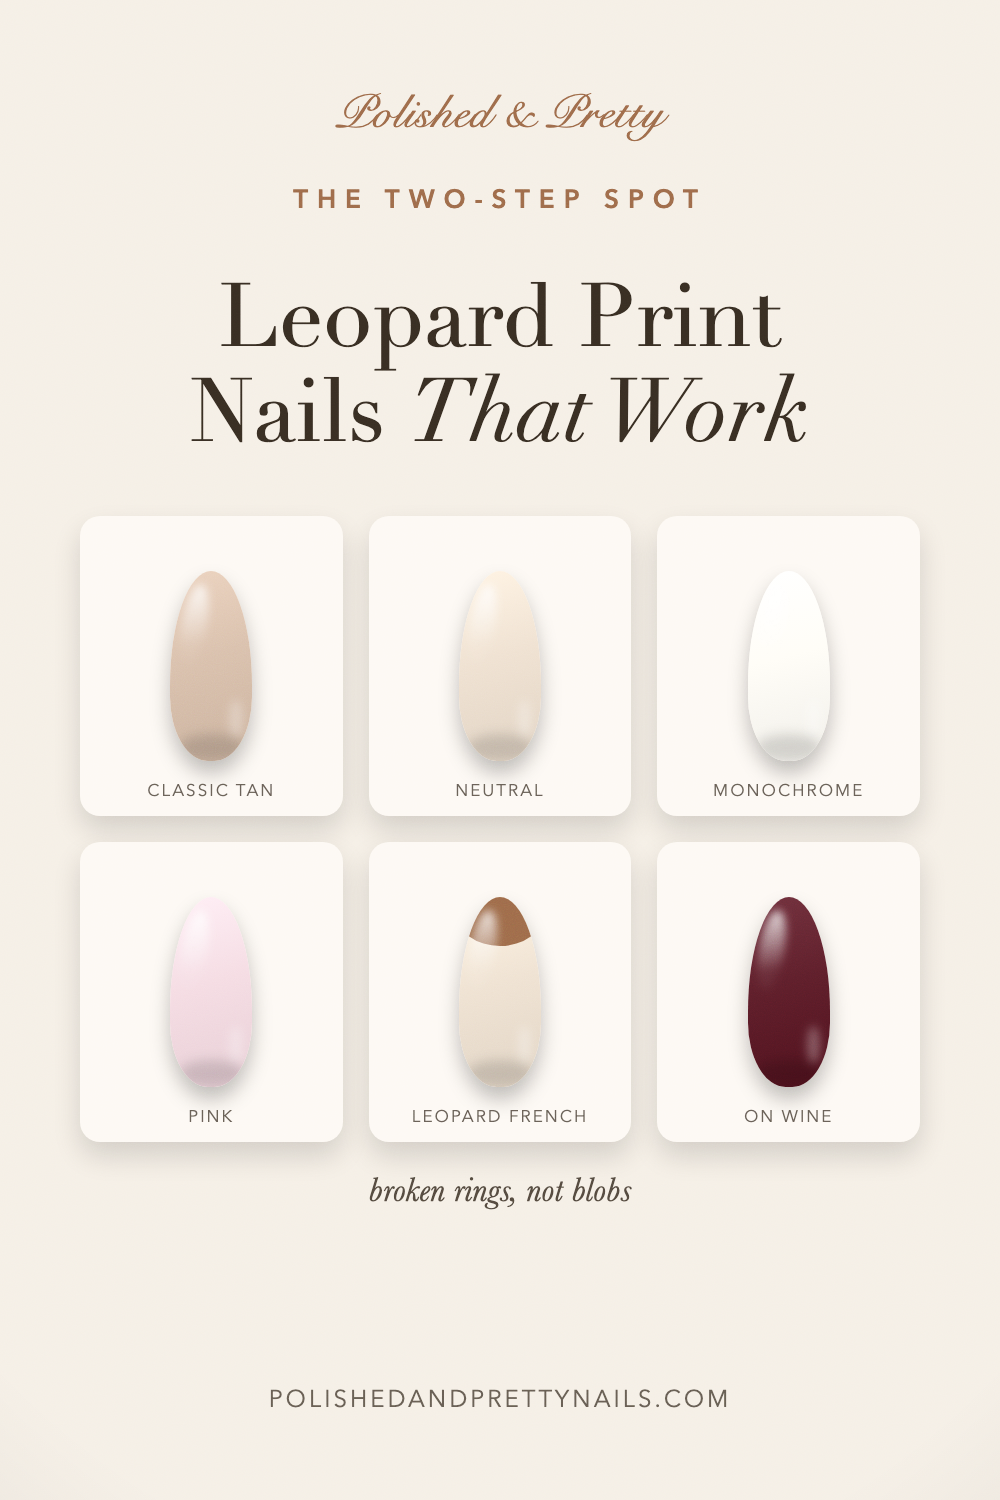
22 leopard print nail designs
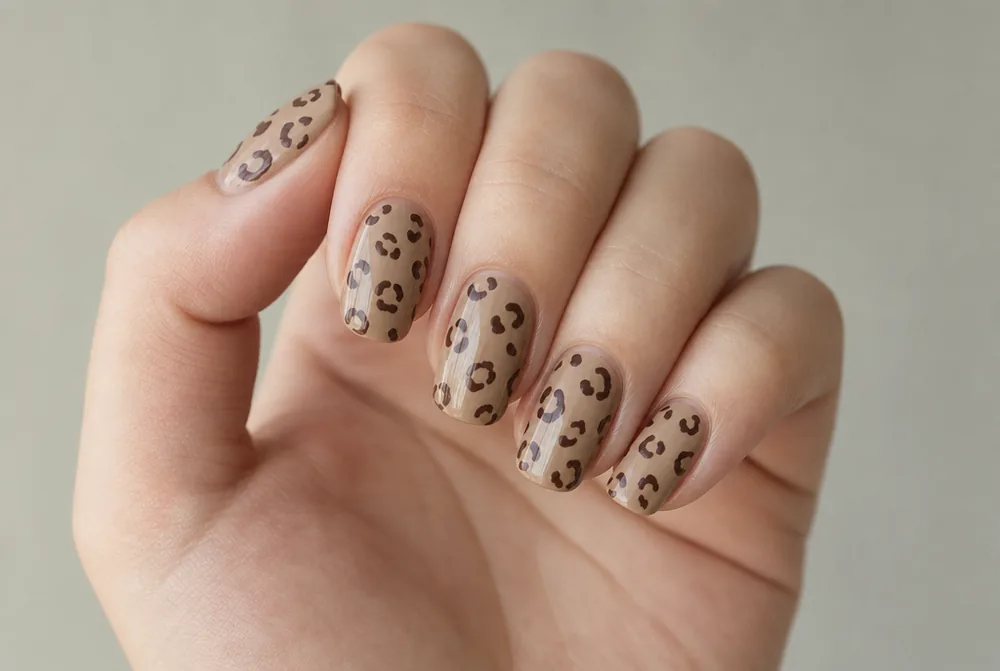
1. Classic Tan and Brown
Warm tan base with dark brown broken rings and a caramel centre in each. It’s the version that actually looks like leopard and the one to learn first. Three or four spots per nail, no more.
2. Two Accent Nails Only
Eight plain nude nails and two printed. This is how I’d wear leopard, because a full set is a lot of pattern and two reads as a deliberate detail. Ring finger and thumb.
3. Neutral Leopard
Beige base with taupe spots, so the contrast is low enough that it reads as texture. It’s the grown-up version and it passes anywhere. More base options in my nude nail designs guide.
4. Leopard French Tip
A French where the tip is printed instead of solid. It’s the most work-appropriate way to wear animal print and it’s my favourite version on this page. Keep the tip generous or the spots crowd.
5. Black and White Leopard
Monochrome print, which reads graphic rather than animal. It’s sharper and less literal than the tan version. More pairings in my black and white nails post.
6. Pink Leopard
Pink base with black rings and a hot pink centre. It’s the playful version and the one that turns up most on Pinterest. More shades in my pink nail designs post.
7. Leopard with Red
Neutral leopard on most nails with one solid red. Red against leopard is a classic pairing that works on nails exactly as it does in clothes. More in my red nail designs guide.
8. Single Spot Accent
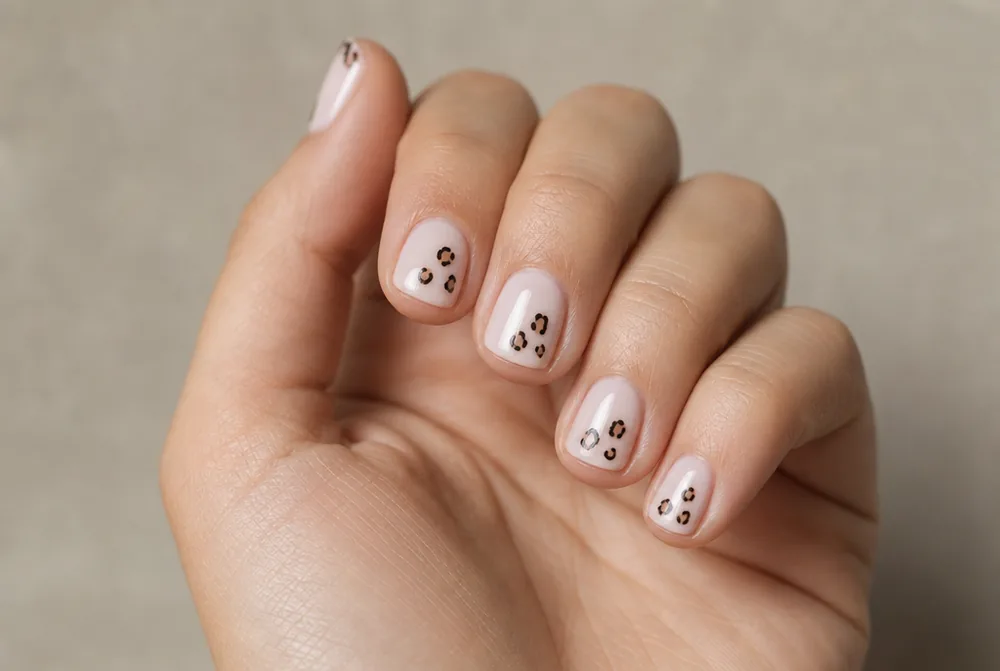
One leopard spot per nail on a bare base, which is the most minimal animal print possible. It’s the version I’d suggest if you like the idea and not the pattern. Off-centre, near the cuticle.
9. Leopard Tips on Milky
Milky base with the print drifting in from the tip and fading out. The gradient in density stops it looking like a stencil. More on the base in my milky white nails guide.
10. Gold Outline Leopard
The broken rings done in metallic gold instead of black. It reads as jewellery rather than as animal print, which is a genuinely different look. More in my gold nail designs post.
11. Snow Leopard
Pale grey base with charcoal rings and a white centre. It’s the cool-toned version and it works in winter where tan leopard reads autumnal. Softer edges than the classic.
12. Leopard Ombre
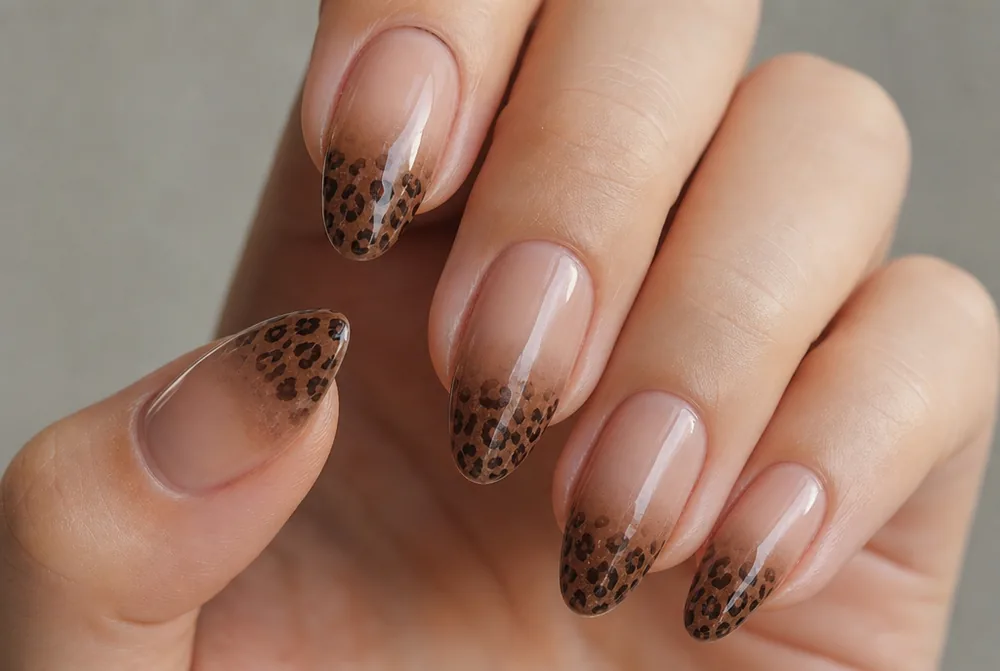
A nude-to-brown fade with the spots getting denser toward the tip. Two techniques on one nail, and the fade hides where the print starts. Technique in my ombre nails guide.
13. Blue Leopard
Pale blue with navy rings, which sidesteps the animal reference entirely and just reads as a pattern. Unexpected colours are the easiest way to modernise leopard. More in my blue nail designs guide.
14. Leopard with Chrome Overlay
A finished print with pearl chrome buffed over it, so the spots sit under a wet sheen. It softens the whole thing and looks far more expensive. Needs gel for the chrome.
15. Matte Leopard
Print under a matte top coat, which reads like actual fur rather than paint. Matte also forgives an imperfect edge on each spot. More on the finish in my matte nails guide.
16. Leopard Half Nail
Each nail split diagonally, solid on one side and printed on the other. It’s graphic and it uses half as much print. Striping tape gives the clean divide.
17. Cheetah Spots
Small solid round spots rather than broken rings, which is technically cheetah, not leopard. It’s much easier to paint and it reads more graphic. Useful to know if a tech asks which you mean.
18. Leopard on Burgundy
Deep wine base with tonal spots, which is the autumn version and the dressiest here. Dark bases make leopard read expensive rather than loud. Full range in my burgundy nails guide.
19. Leopard Toes
Print on the big toes only with solid colour on the rest. The bigger surface makes the spots easy and a pedicure lasts four to six weeks. More in my toe nail designs guide.
20. Negative Space Leopard
Spots painted straight onto a bare glossy nail with no base colour at all. It’s the most modern version and it needs nails in good condition. Fewer spots than you’d think.
21. Leopard with Rhinestone
One small crystal set inside a single spot on one nail. It’s the smallest possible amount of sparkle and it stops the print looking flat. One stone, one nail.
22. Leopard on Short Square
Two or three small spots on very short nails, which needs a much smaller scale than a long nail does. Crowding is the risk here. My square nail ideas post has more at that shape.
The two-step spot
This is the whole technique, and it’s why hand-painted leopard beats stickers when it’s done right.
Step one is the centre. Place an irregular blob of a mid-tone colour, warmer or darker than the base. Caramel on tan, hot pink on pink, white on grey. Irregular is essential; a perfect circle here is what makes the final spot look like a dot.
Step two is the ring, and it’s a broken one. With a fine-liner brush in a much darker colour, draw two or three short crescents around the centre blob, leaving obvious gaps between them. Never a closed circle.
That’s it. The gaps are what your eye reads as fur. Vary how many crescents you use per spot, and let a few spots be nothing but a bare crescent with no centre at all, which is what real leopard does at the edges of the pattern.
Spacing and scale
The spots themselves can be perfect and the manicure can still fail on how they’re arranged.
Vary the size across a single nail. Two large spots, one medium, and a couple of tiny ones reads as fur. Five identical spots reads as a stencil, which is exactly what most sticker sets look like.
Let some spots run off the edge of the nail. Real pattern doesn’t stop politely at a border, and a spot half-cut by the free edge is what makes the print look continuous rather than applied.
Leave empty space. Three or four spots on a medium nail is plenty, and crowding is the most common mistake. The base colour showing through in generous gaps is part of the design.
Colour pairings that avoid costume
Animal print carries more baggage than most designs, and the palette is what decides whether it reads chic or Halloween.
Low contrast is the safest route. Beige with taupe, milky white with soft grey, nude with caramel. At low contrast the eye reads texture first and animal second, which is exactly what you want in an office.
Unexpected colours sidestep the reference entirely. Blue leopard, green leopard, or a monochrome black-and-white print reads as a graphic pattern rather than as fur, because no animal is that colour.
The combination to be careful with is high-contrast tan and black across all ten nails, which is the most literal version. It’s not wrong, it’s just the one most likely to read as a costume. Two accent nails fixes it instantly.
Leopard, cheetah, and jaguar
These get used interchangeably and they’re three visibly different patterns, which matters if you’re bringing a photo to a salon.
Leopard is the broken ring with a coloured centre, which is what most people mean and what this page mostly covers. It’s the most detailed of the three and the one that looks most like fur on a nail.
Cheetah is a small solid round spot with no ring and no centre. It’s much faster to paint, it reads more graphic, and it’s genuinely easier to do at home. If you want animal print and you’ve never painted nails, start here.
Jaguar is a larger broken ring with small solid dots inside it. It’s the boldest of the three and it needs a longer nail to be readable. Say which one you mean when you book, since “animal print” gets interpreted differently everywhere.
Doing it at home, and what it costs
Leopard is more forgiving than it looks, because the pattern is meant to be irregular and mistakes read as variation.
You need three polishes and one brush: a base, a mid-tone for the centres, a dark for the rings, and a fine-liner brush at around $8. A dotting tool helps with the centre blobs but a brush does both jobs.
Let each layer dry fully. Painting the dark ring into a tacky centre drags the two colours together and gives you a brown smudge. Two minutes between steps with regular polish.
At a salon, hand-painted animal print is charged per nail, commonly $5 to $10 each on top of a $45 to $65 gel set. Two accent nails is around $15; a full set can be $70 and looks busier. Two is the better call on both counts.
Stickers, stamping, or freehand
There are three ways to get animal print onto a nail without a salon, and they give visibly different results.
Water decals are the cheapest and the fastest, around $5 for a sheet of dozens. The catch is that printed sheets repeat the same spot arrangement, so ten nails end up identical and the eye reads it as wallpaper. Cut the sheet up and use pieces at different angles to break that.
Stamping plates give a crisper print than decals and cost about $15 for a kit that lasts years. Same repetition problem, same fix: rotate the plate between nails so the pattern lands differently each time.
Freehand is slower and it is the only method that produces genuinely irregular spots, which is the thing that makes leopard look real. It is also the only one where a mistake reads as variation rather than as a flaw, which makes it far less stressful than it sounds.
Wearing leopard without it taking over
Animal print is a loud pattern in a small space, so the rest of the manicure has to stay quiet for it to work.
Skip glitter entirely. Print plus sparkle is two competing textures and the result reads busy no matter how well each half is executed. If you want shine, use a chrome overlay across the whole nail instead, which unifies rather than competes.
Keep the length short or medium. Long nails give the pattern more room, which sounds good and in practice means more spots and more visual noise. Short square and short almond both wear leopard better than a long coffin does.
And pair it with one solid colour rather than several. Leopard accent nails against a matched nude is the combination that always works, and my nail shapes guide covers picking a shape that keeps the print readable.
FAQ
How do you paint leopard print nails?
Paint an irregular blob of a mid-tone colour first, then draw two or three short dark crescents around it with a fine-liner brush, leaving gaps between them. The broken ring is what makes it read as leopard rather than as a dot. Vary the spot sizes and let some run off the edge of the nail.
What is the difference between leopard and cheetah print nails?
Leopard spots are broken rings with a coloured centre, while cheetah spots are small solid round dots with no ring at all. Cheetah is significantly easier to paint and reads more graphic; leopard looks more like real fur. Say which one you want when you book, since salons use the terms loosely.
Are leopard print nails tacky?
Only at high contrast across all ten nails, which is the most literal version. Low-contrast neutral leopard, a leopard French tip, or two printed accent nails all read as chic rather than costume. Unexpected colours like blue or monochrome also sidestep the animal reference entirely.
How many leopard spots per nail?
Three or four on a medium nail, and two or three on a short one. Crowding is the most common mistake, and generous gaps of base colour are part of the pattern. Vary the sizes and let at least one spot run off the edge of the nail.
Start with neutral leopard on two accent nails, which is the cheapest way in and the easiest to wear. And if the two-step spot feels fiddly, cheetah spots get you most of the effect with a dotting tool alone.
Leopard is far quicker stamped than painted and the spacing comes out even every time. My nail stamping post covers the kit and the technique.