Aura nails are the design that made me buy a set of makeup sponges. The look is a soft halo of colour glowing out of the middle of the nail with no edges anywhere, like light coming through frosted glass. It sounds like it needs an airbrush and a salon. It doesn’t, and the trick that makes it work is a placement rule almost nobody mentions.
Here are 22 aura nail designs across every colour family, plus the three ways the glow gets made, a sponge tutorial that works with regular polish, and the reason your first attempt probably looked like a blob. If you already know the sponge technique, my ombre nails guide uses the same skill in a different shape.
22 aura nail designs
1. Pink Aura on Nude
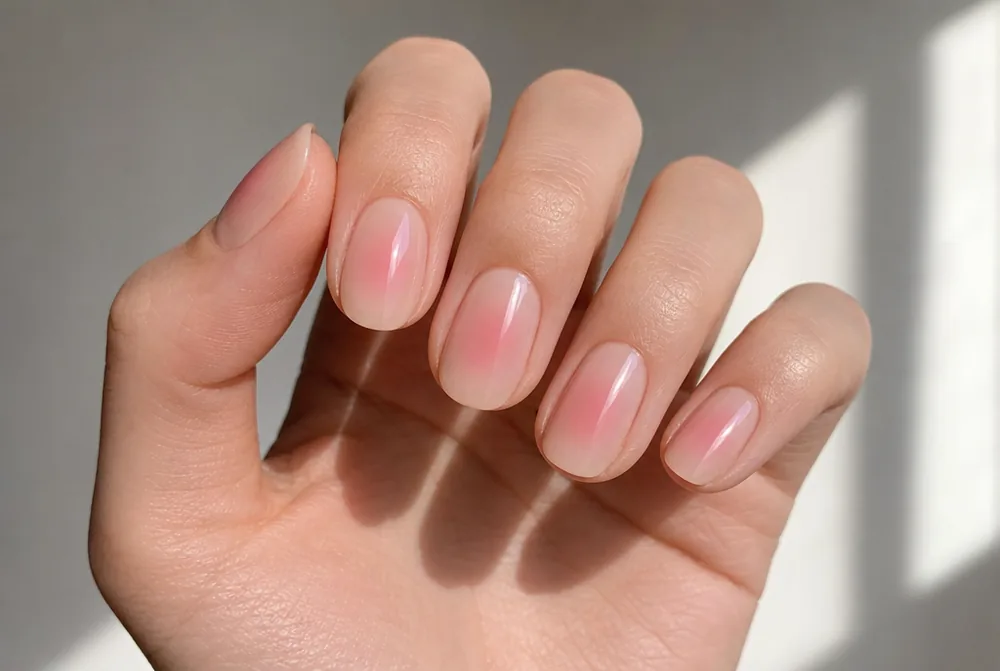
A soft pink halo on a matched nude base, edges fading completely. It’s the version everyone starts with and the most wearable one here. More shades in my pink nail designs post.
2. Red Aura
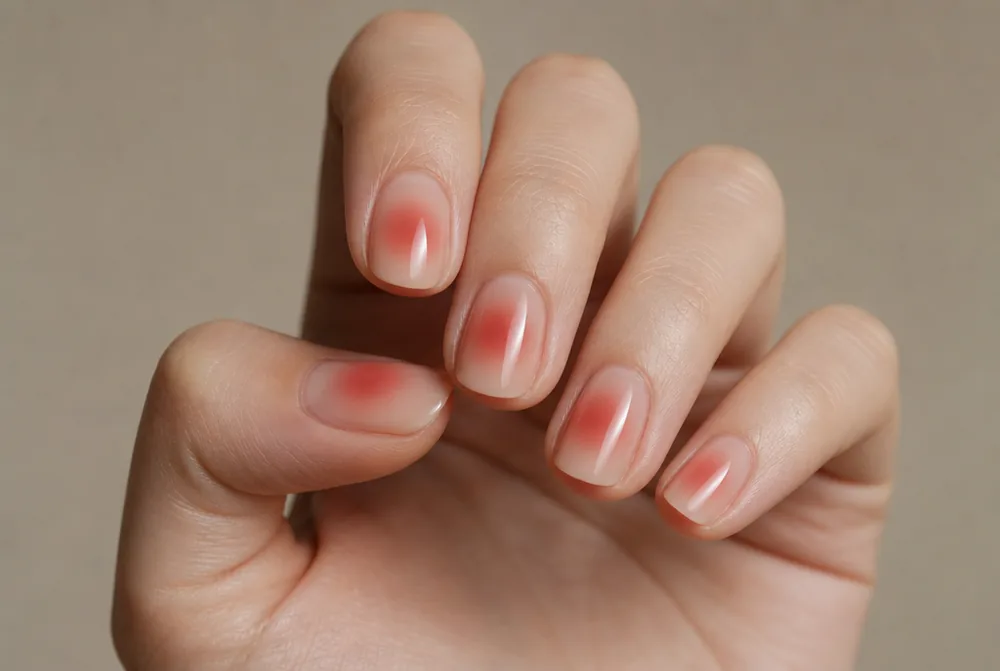
A red halo on nude, which reads far softer than a red manicure but still registers as red. It’s my pick for a holiday party when a full red feels like too much. Use a cool red; warm reds go orange at the fade.
3. Blue Aura
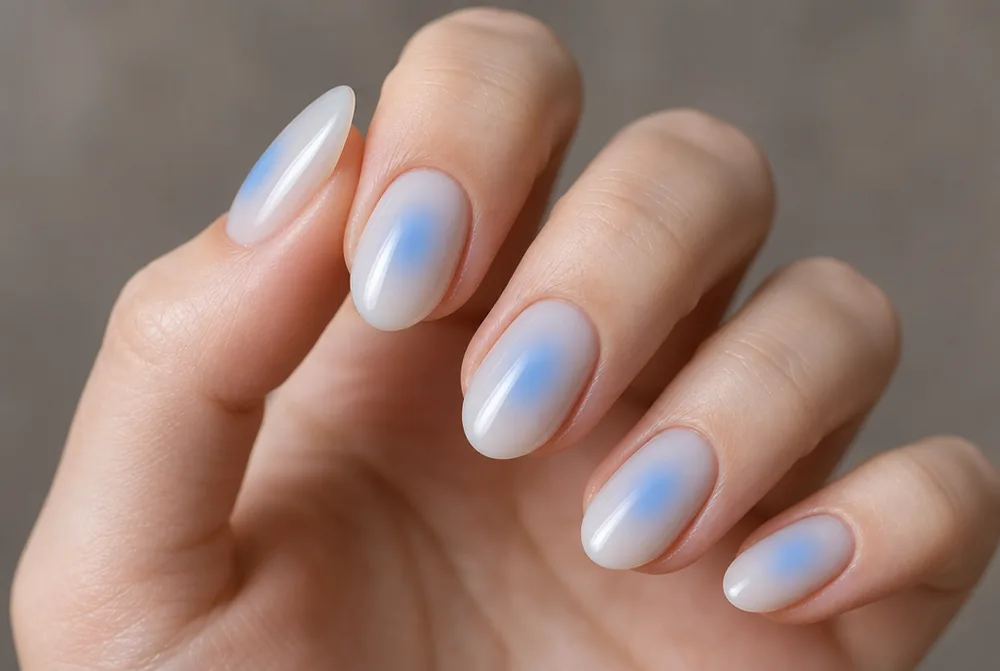
A cool blue halo over a milky base, which looks like light through ice. Blue fades more cleanly than most colours because the family has so many mid-tones. More in my blue nail designs guide.
4. Purple Aura
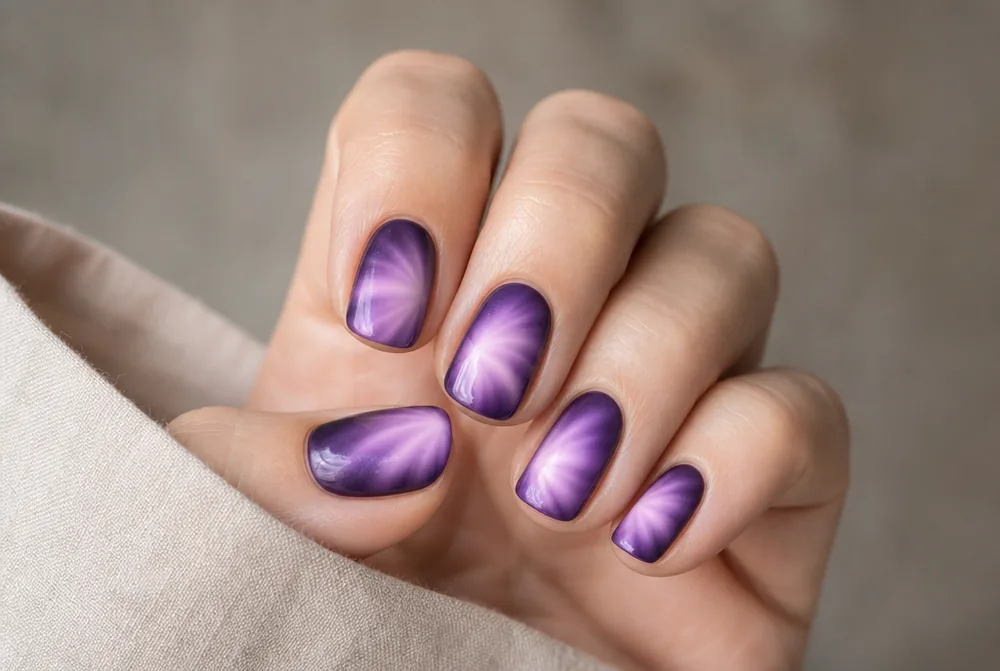
Violet glowing out of a pale base, which is the classic aura and the one the trend started with. Purple is the easiest colour to blend because it sits between warm and cool. More in my purple nail ideas post.
5. Green Aura
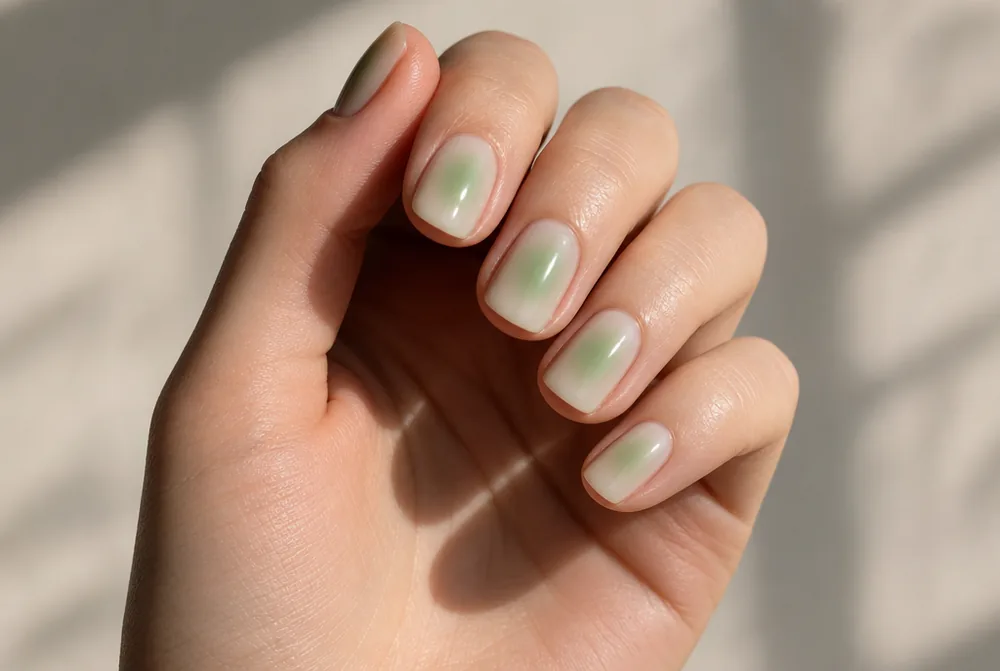
A cool green halo, which reads like sea glass. Keep the green blue-leaning; a yellow-green aura goes murky at the edges where it thins out. More in my green nail designs guide.
6. Peach Aura
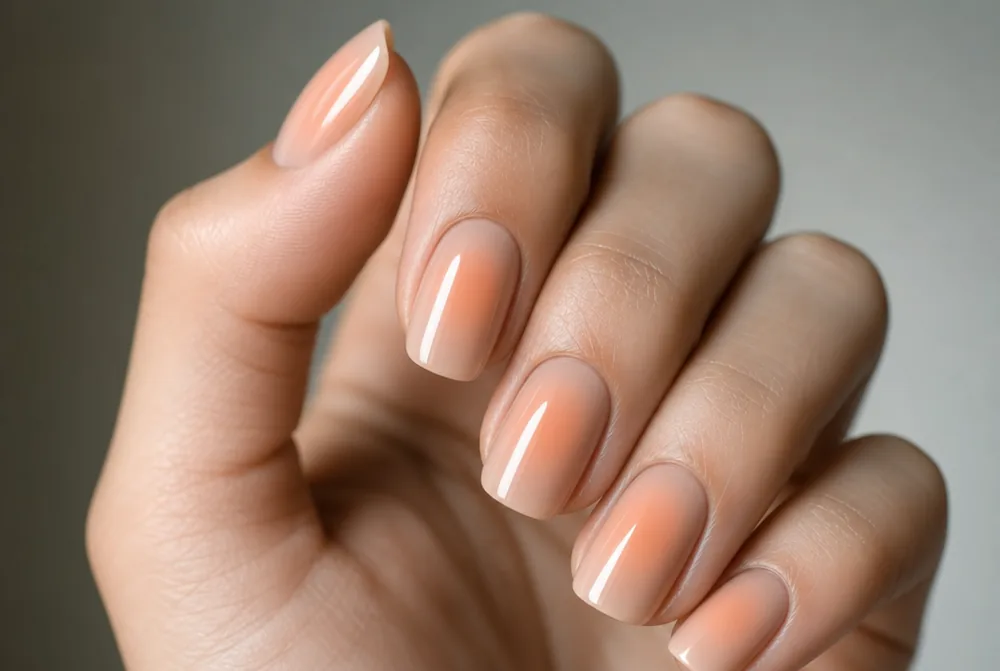
A warm peach halo on a warm nude, which is the most flattering aura on golden and olive hands. It’s barely a colour and it still changes the whole hand.
7. Black Aura
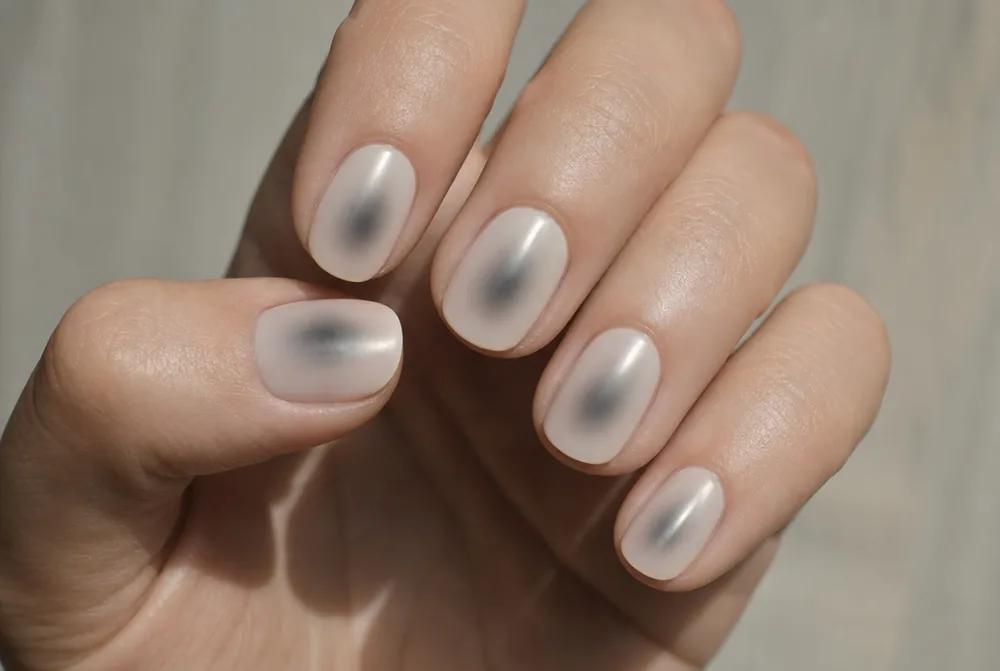
A smoky grey-black halo on a pale base, which is the moodiest thing here and looks like ink in water. Use grey rather than true black or the edge stays hard. More in my black nail ideas post.
8. Aura with Chrome Overlay
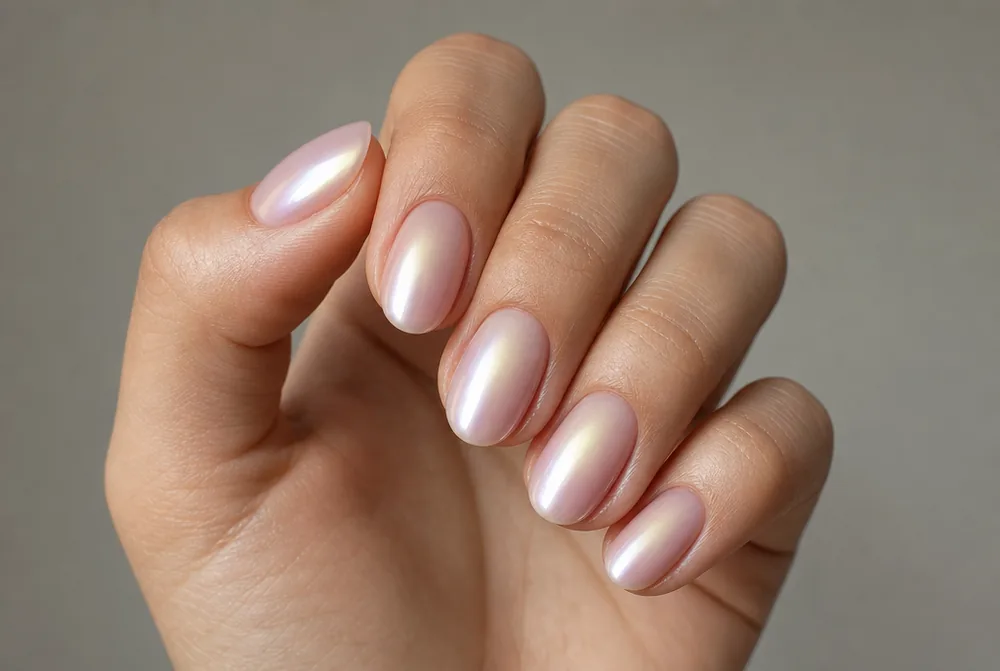
A finished aura with pearl chrome buffed over the top, so the halo sits under a wet-glazed sheen. It’s the most expensive-looking version on this page. Needs gel for the chrome layer.
9. Double Aura
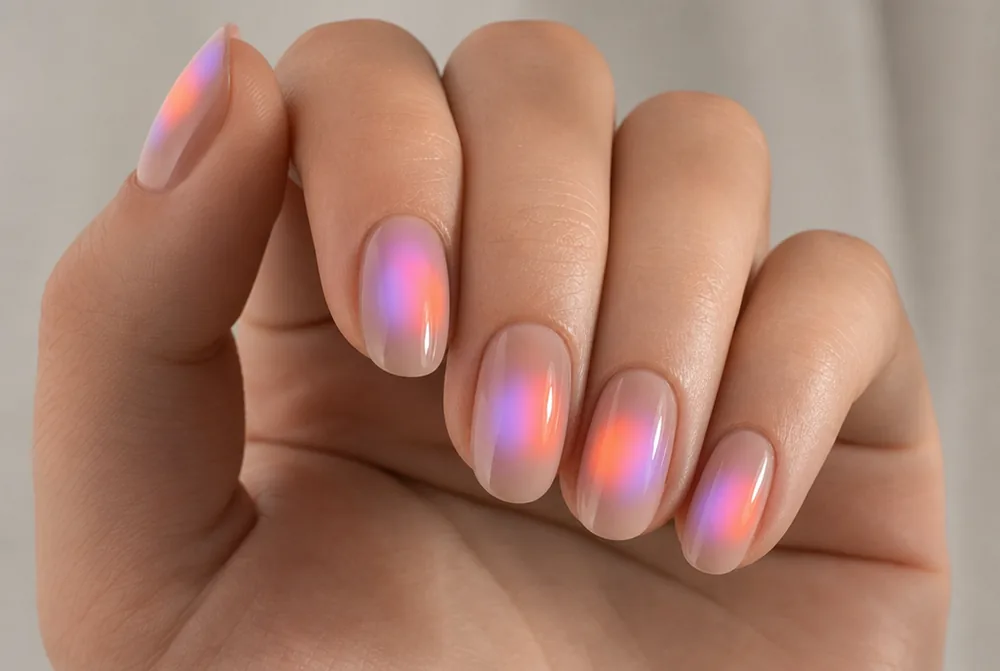
Two halos in different colours overlapping slightly, usually pink and blue. Where they meet gives you a third colour for free. Keep both soft or it turns into a bruise.
10. Aura French
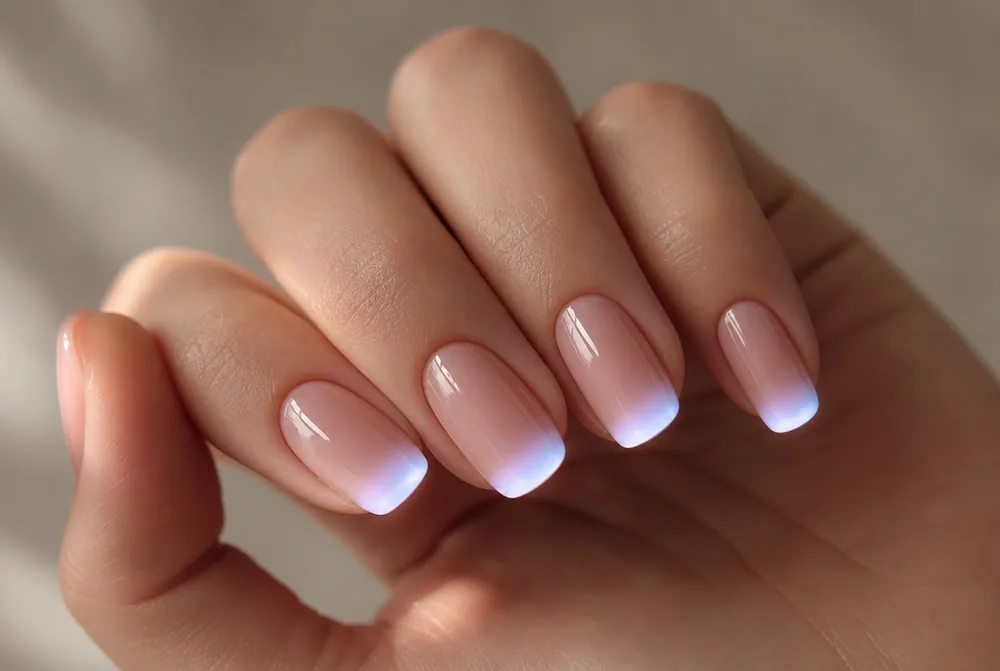
The halo pushed up to the tip instead of the centre, so it works like a diffused French. Grow-out is invisible, which makes it the most practical aura here. Ask for a blurred or airbrushed French.
11. Burgundy Aura
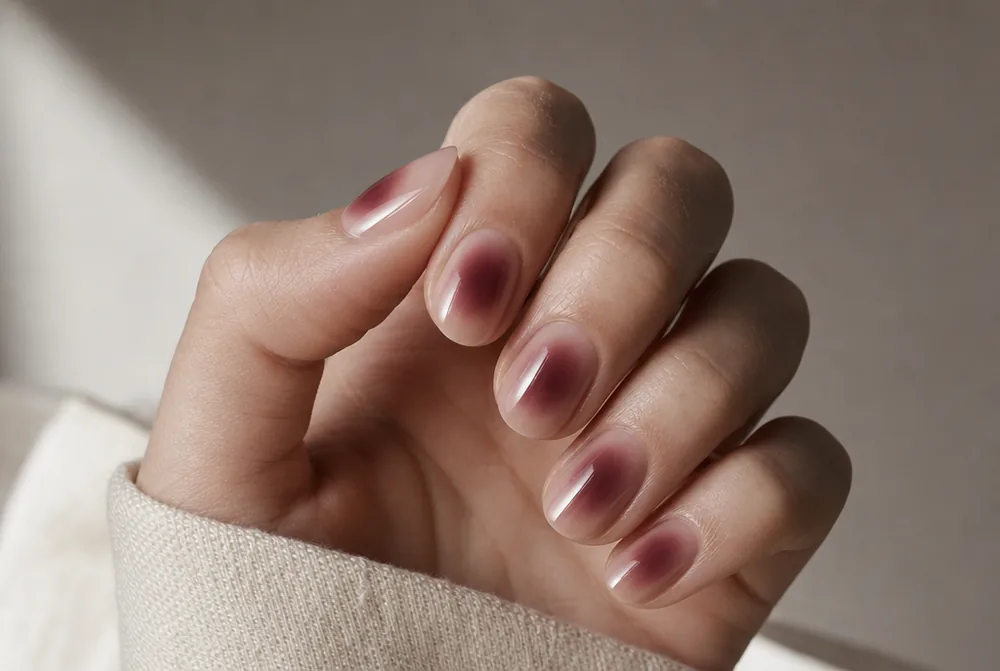
A deep wine halo on nude, which is the autumn and winter aura. It’s darker than most versions and it still reads soft. Full range in my burgundy nails guide.
12. Aura on Milky White
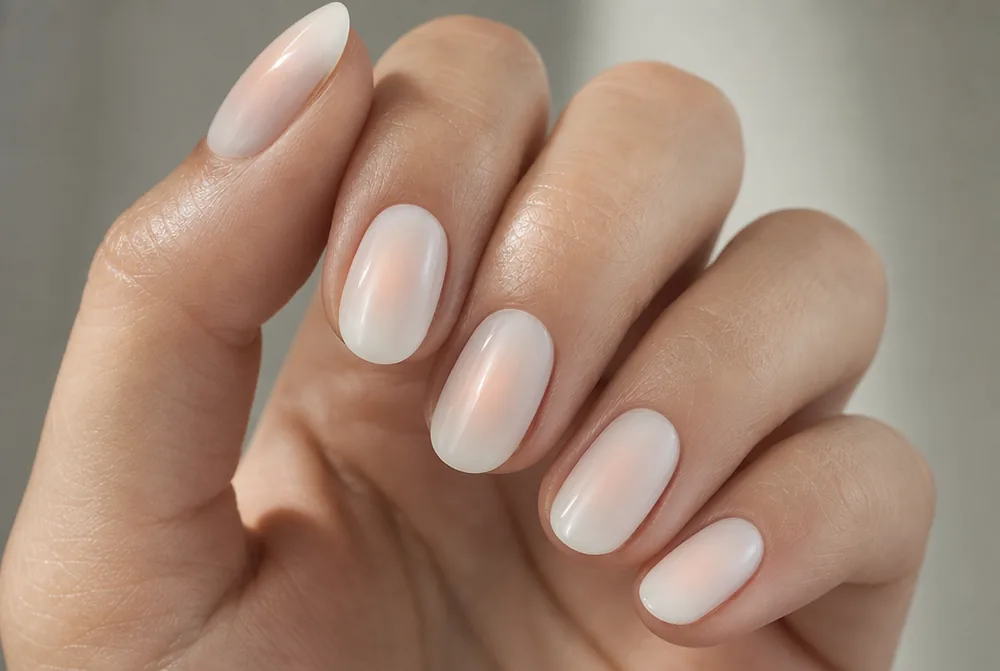
A milky white base instead of nude, which makes the halo read cooler and cleaner. It’s the version that suits fair hands best. More on the base in my milky white nails guide.
13. Orange Sunset Aura
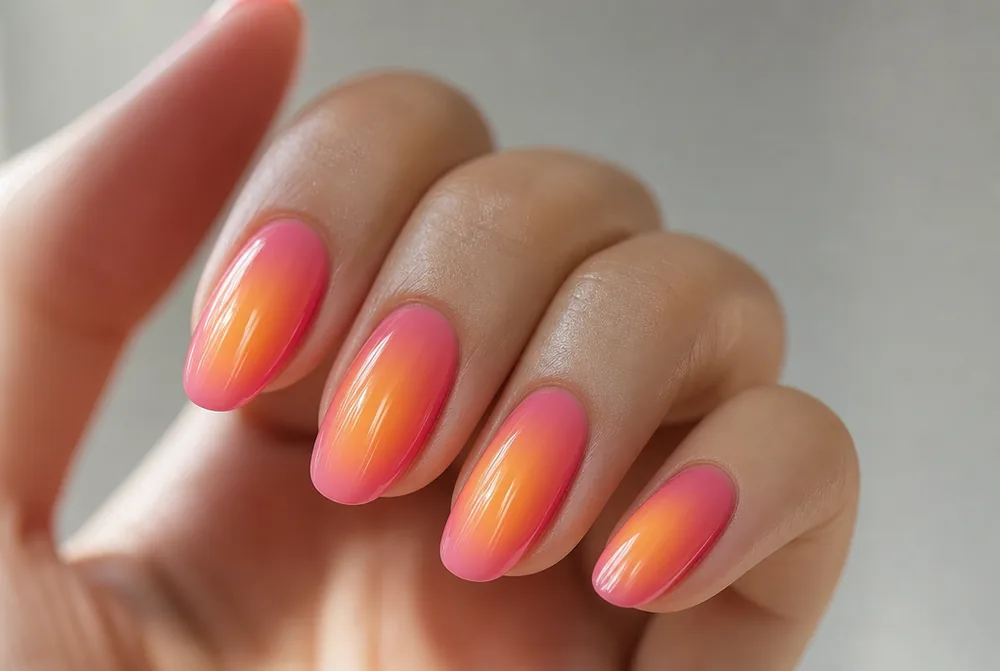
Orange at the core fading through pink at the edges, like a sunset compressed onto a nail. It’s the warmest thing here and it suits tanned hands. Two colours, one sponge, in that order.
14. Silver Aura
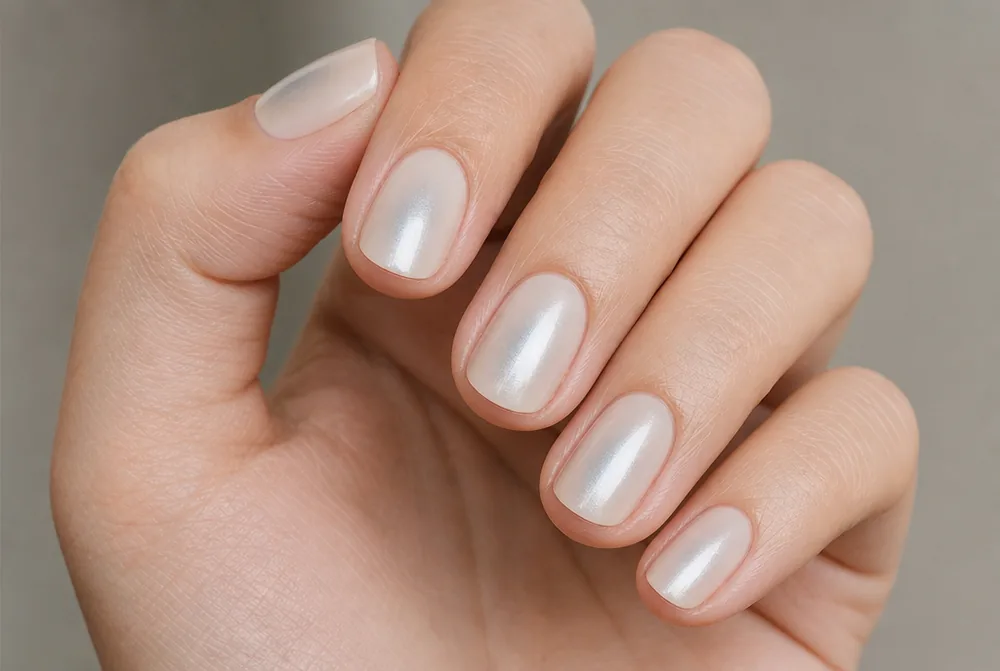
A metallic silver halo, which is technically difficult because metallics resist blending. Sponge it in very thin passes. More in my silver nail designs guide.
15. Aura Toes
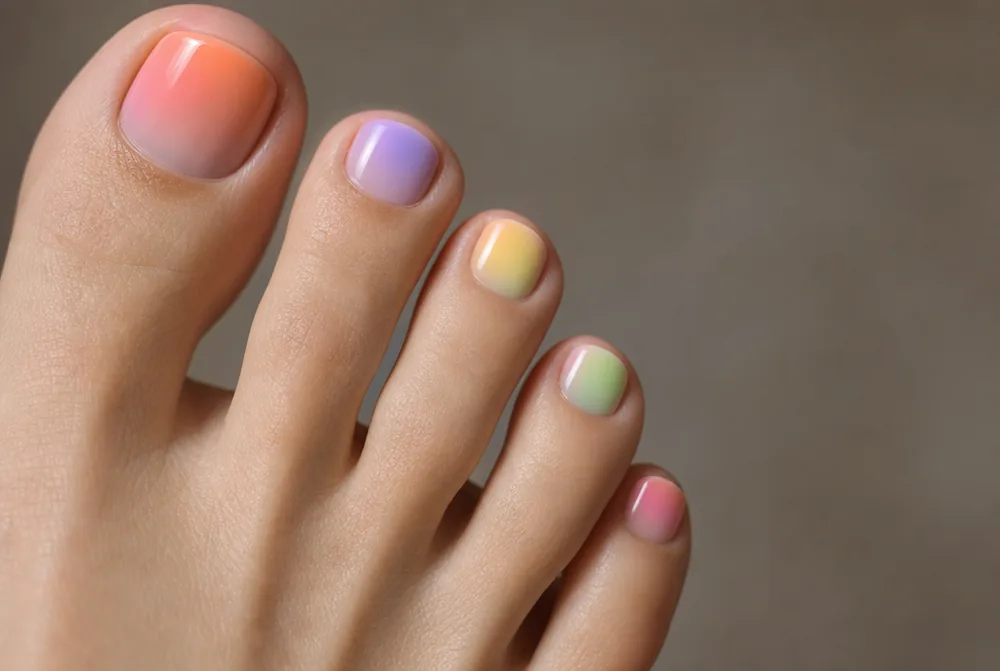
Aura on a pedicure, where it lasts four to six weeks and nobody inspects it at close range. It’s the best place to practise the technique. More in my toe nail designs guide.
16. Aura with Micro French
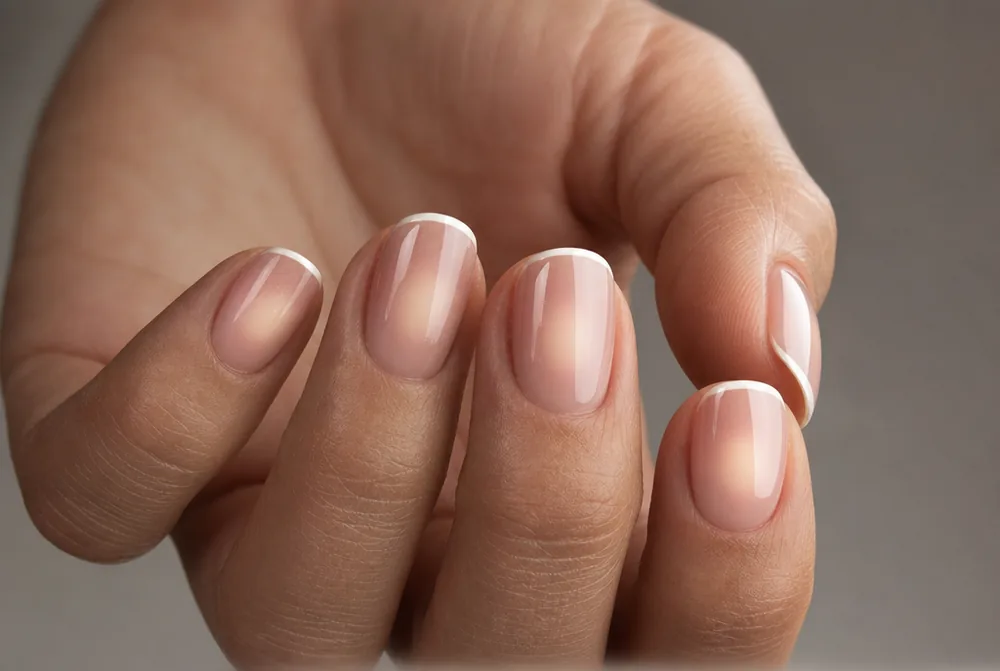
A soft halo with a hairline of white at the very edge on top. The one crisp line makes all the blur behind it look intentional rather than accidental. My favourite detail on this page.
17. Aura on Sheer
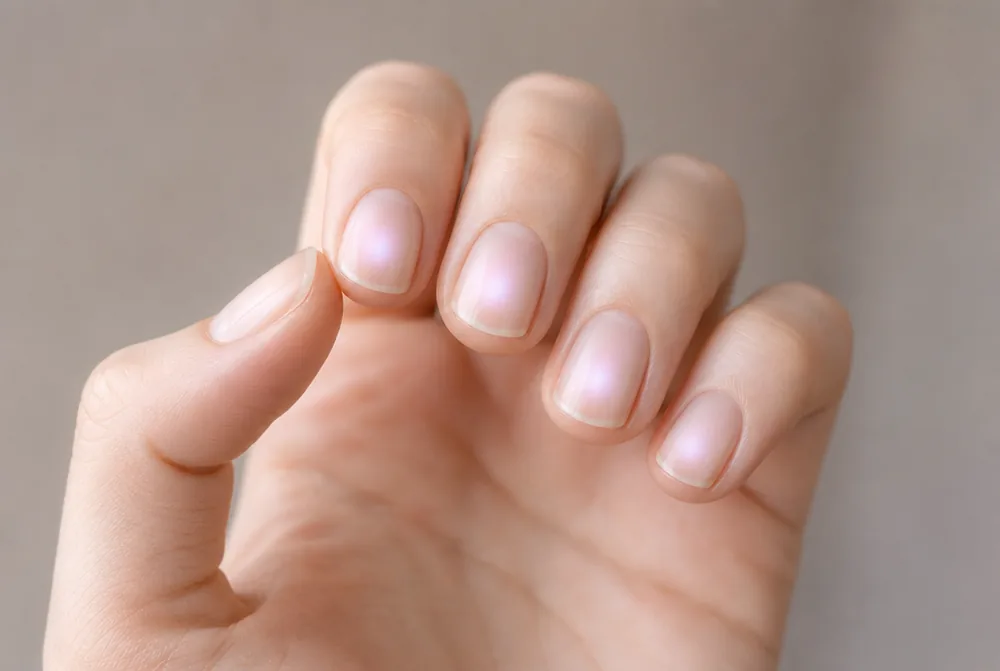
A halo floating on a nearly transparent base, so the natural nail shows through everything. It’s the most modern version and it needs nails in good condition. Two coats of top coat maximum.
18. Aura Skittle Set
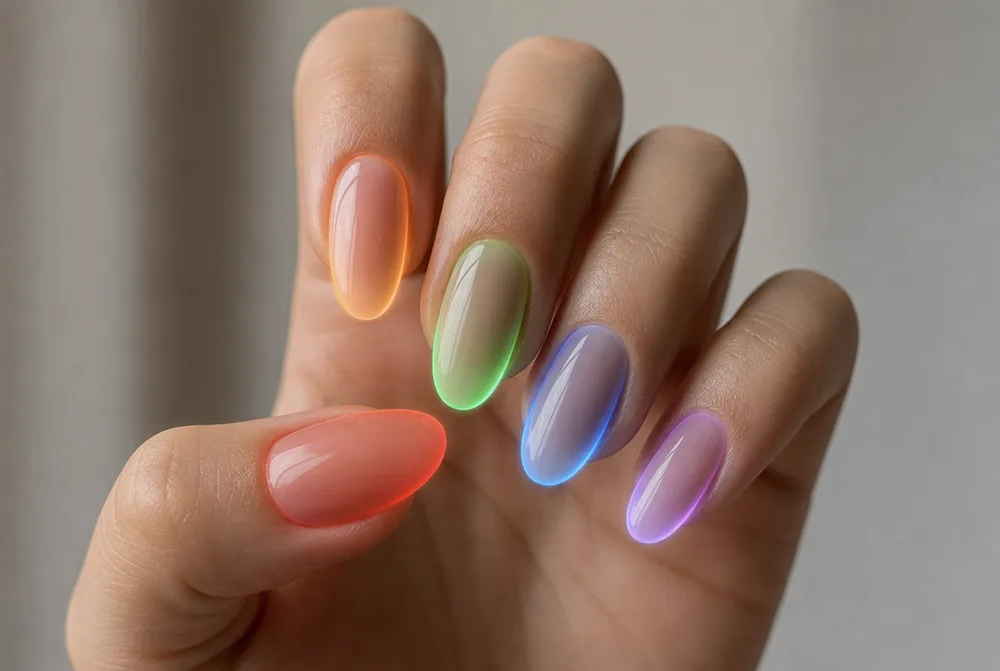
A different aura colour on every nail, all on the same nude base. The shared base is what keeps it from looking chaotic. Pick five shades from one family rather than five random ones.
19. Aura with Foil Flecks
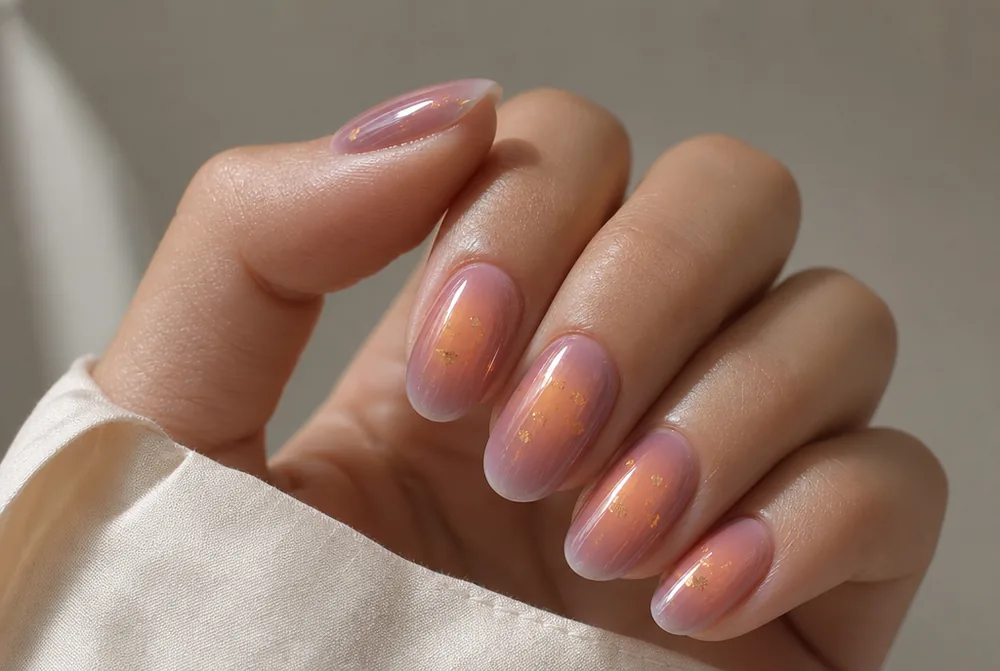
A few torn gold flecks scattered into the brightest part of the halo. The hard edges of the foil against the soft glow is the whole idea. More placements in my gold nail designs post.
20. Brown Aura
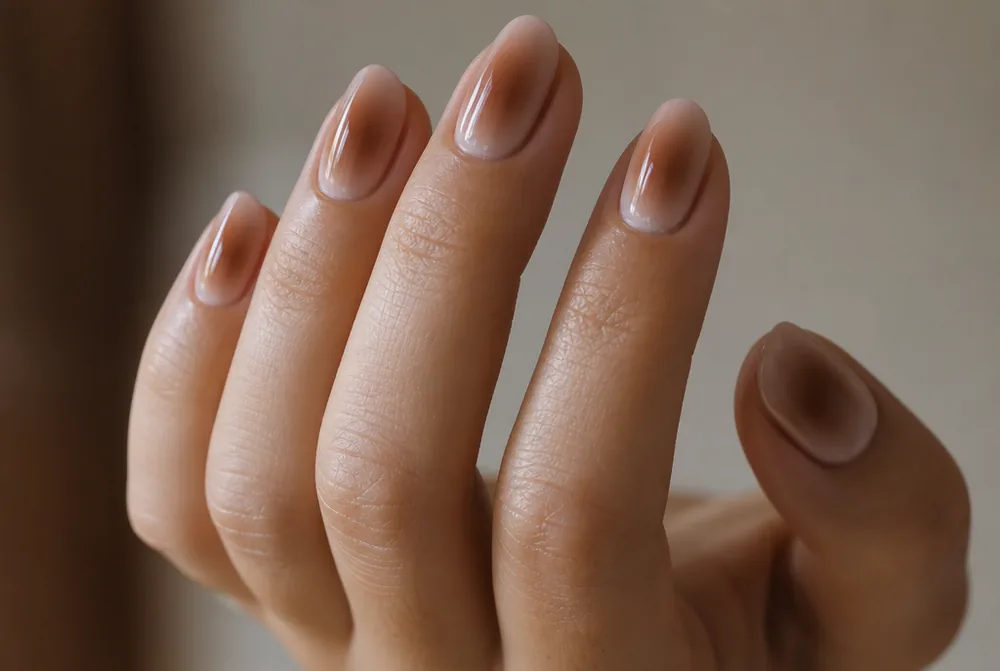
A coffee brown halo on a warm nude, which is the most understated aura and reads almost like a shadow. It’s the one that works in a conservative office. More in my brown nail designs guide.
21. Aura on Short Squoval
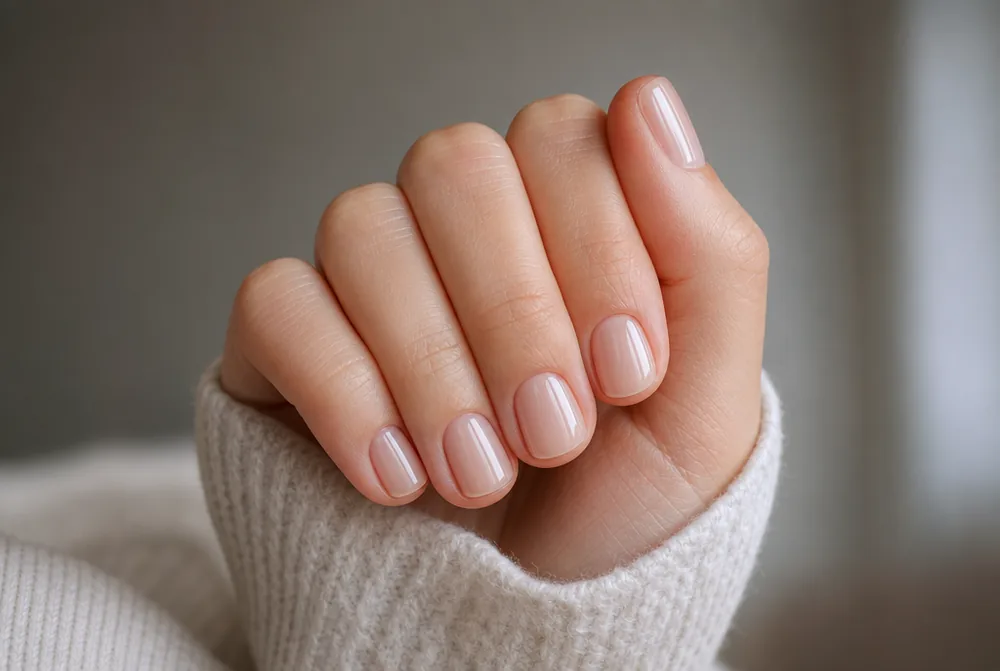
A compact halo on very short nails, which works better than most designs do at that length because there’s no line to run out of room. Keep the glow small and off-centre. My extra short nail ideas post has more.
22. Long Almond Aura
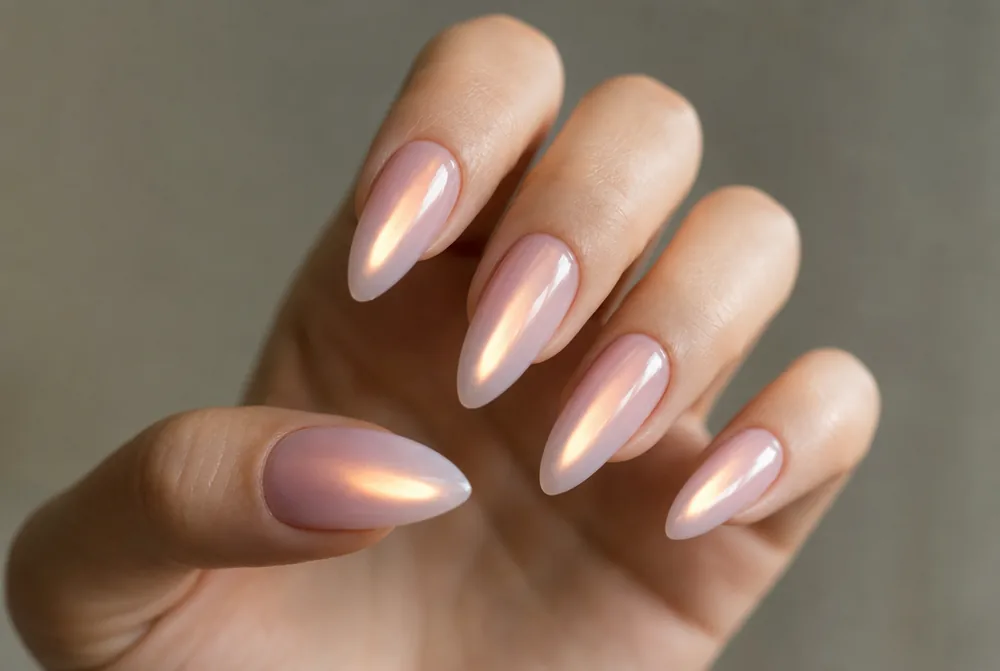
Long almond is where aura looks best, because the oval field matches the shape of the glow. If you have the length, the halo can be bigger and softer. Shape details in my almond nail designs guide.
The three ways an aura is made
The same design comes out differently depending on which method your salon uses, and it’s worth asking before you book.
Airbrushing is the cleanest. The colour is sprayed in a soft circle with no physical contact, so the fade is perfectly even. It’s what produces the photos you’ve seen, and it’s still relatively uncommon outside larger salons.
The sponge method presses colour on with a cosmetic sponge in light passes. It’s what most gel technicians use and what works at home. Slightly less even than airbrush and honestly no worse for it.
Blooming gel is the third and it’s the one people misunderstand. It’s a clear gel that makes coloured gel spread and diffuse on contact, so you place a dot and it blooms outward on its own. It gives the softest edge of the three and it takes practice to control.
Doing an aura at home with a sponge
This works with regular polish and takes about twenty minutes for both hands including dry time.
Start with a full base colour across the whole nail, dried completely. Nude or milky white is the standard. Skipping this and sponging onto bare nail is why home auras look patchy.
Dab your glow colour onto a cosmetic sponge in a small blob, then press it onto the nail in the same spot three or four times, lifting straight up each time. The colour builds densest where you pressed most and thins at the edges on its own. Press, never wipe.
Let it dry, then finish with two coats of top coat, because sponging leaves texture that one coat won’t level. If the edge still looks hard, one more very light pass with a clean part of the sponge softens it.
Why the glow has to sit off-centre
This is the rule that separates an aura from a blob, and almost no tutorial says it out loud.
A halo placed dead centre in the middle of the nail reads as a target. It’s symmetrical, it’s static, and the eye immediately reads it as a circle of paint rather than as light.
Placed slightly high and slightly off to one side, the same halo reads as a light source coming from somewhere. That asymmetry is what makes it look like a glow instead of a dot. Aim for the upper third of the nail, offset toward the outer edge.
Vary the placement slightly across the ten nails rather than putting it in the identical spot each time. Consistency here reads as a pattern; slight variation reads as natural light.
Picking colours that blend
Aura fails on colour choice more often than on technique, and the failure is always at the thin outer edge.
The glow colour has to look good at low opacity, because the outer edge of the halo is that colour stretched thin. Cool colours generally thin out cleanly; warm yellow-based colours can go murky and slightly green where they meet a nude.
Match the temperature of the glow to the base. A cool pink over a warm caramel nude fights at the join, while a cool pink over a cool rosy nude blends invisibly. Same family, two steps apart.
Skip metallics and glitters as the glow colour on a first attempt. Both resist blending because the particles sit on the surface rather than thinning out, which is why silver aura is the hardest one here.
What to ask for at the salon
Bring a photo. “Aura nails” covers everything from a barely-there glow to a saturated halo, and the price varies with the method.
Ask which technique they use. If they airbrush, you’ll get the smoothest result and it usually costs $15 to $25 on top of a gel set. Sponged aura is often $10 to $15 and is charged as a design add-on.
Say how strong you want the glow. Techs default to more saturated because it photographs better, and softer almost always looks better in person. “Very soft, just a hint” is a useful sentence.
Ask for the halo high and off-centre rather than in the middle. Saying that one thing will improve the result more than anything else you could specify.
FAQ
How do you do aura nails at home?
Paint a full nude or milky base and let it dry, then dab your glow colour onto a cosmetic sponge and press it onto the same spot three or four times, lifting straight up each time. The colour builds densest where you pressed and thins at the edges by itself. Finish with two coats of top coat, since sponging leaves texture.
What is blooming gel used for?
Blooming gel is a clear gel that makes coloured gel spread and diffuse on contact, so a dot placed on it blooms outward into a soft halo on its own. It gives the softest edge of any aura method and needs no sponge or airbrush. It only works with gel and a lamp, and it takes practice to control how far the colour travels.
Why do my aura nails look like a blob?
Almost always because the glow is centred in the middle of the nail, which reads as a target rather than as light. Move it to the upper third and offset it toward one side, and vary the placement slightly between nails. The other common cause is wiping the sponge instead of pressing it, which smears the edge.
Are aura nails still in style?
Yes, and the design has settled into regular salon rotation rather than fading out. What has changed is the saturation: the current version is far softer than the bright halos the trend started with, and often finished with a pearl chrome overlay. I track the wider picture in my 2026 nail trends report.
Start with a pink or peach aura on a matched nude, since low contrast forgives an imperfect blend. And practise on your toes first, where nobody is looking closely and it lasts six weeks.
An aura is really one soft shape placed well, which is the same idea behind everything in my abstract nails post.