Polka dot nails sit one decision away from looking like a kids’ party, and the decision is spacing. Evenly spaced dots of identical size read as gift wrap. Dots that vary in size and cluster unevenly read as a design someone made on purpose. Same tool, same colour, completely different manicure.
Here are 22 polka dot nail designs from a single dot to full pattern, plus the sizing and spacing rules that keep them modern, the dotting tool technique, and what to use if you don’t own one. If you want the broader easy-art category, my beginner nail designs guide covers more of it.
22 polka dot nail designs
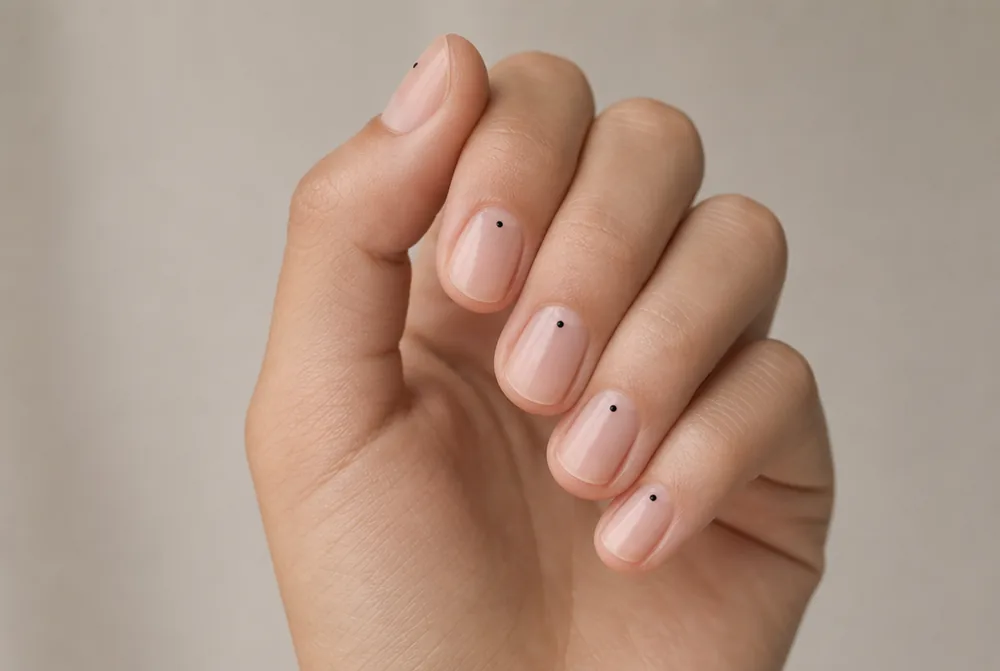
1. Single Dot at the Cuticle
One small dot near the base of each nail and nothing else. It’s the most minimal version and the most wearable. Place it off-centre; dead middle reads as accidental.
2. Two-Dot Cluster
Two dots of different sizes sitting close together on two accent nails. The size difference is doing all the work. Big one first, small one beside it.
3. Black on White Classic
Small black dots on a white base, which is the version everyone pictures. Keep the dots small and slightly irregular in placement. More pairings in my black and white nails post.
4. White on Red
White dots on a cool red, which is retro without tipping into costume as long as the dots stay small. It’s the most classic combination after black on white. More reds in my red nail designs guide.
5. Tonal Dots
Dots in a shade one step deeper than the base, so the pattern reads as texture rather than as spots. It’s the most grown-up version here and the one I’d wear to work.
6. Graduated Dots
Dots that start large at the cuticle and shrink toward the tip. The gradient in size makes it read as a design rather than a scatter. Three or four dots per nail is enough.
7. Dotted French Tip
The smile line of a French made from small dots instead of a solid line. It’s a real design that still passes anywhere. Space them evenly here, since this is the one place regularity works.
8. Gold Dot Cluster
Three or four gold dots clustered near the base of a dark nail. Metallic dots read as jewellery rather than as spots. More placements in my gold nail designs post.
9. Dots on One Accent Nail
Nine solid nails and one dotted. It’s the cleanest way to include a pattern without committing to it. Ring finger, always.
10. Milky Base, White Dots
Brighter white dots on a milky white base, so it’s texture rather than contrast. It’s the softest thing here. More on the base in my milky white nails guide.
11. Scattered Micro Dots
Very small dots scattered sparsely and deliberately unevenly, like a speckled egg. Sparse is the whole point; five or six per nail. Irregularity is what makes it look modern.
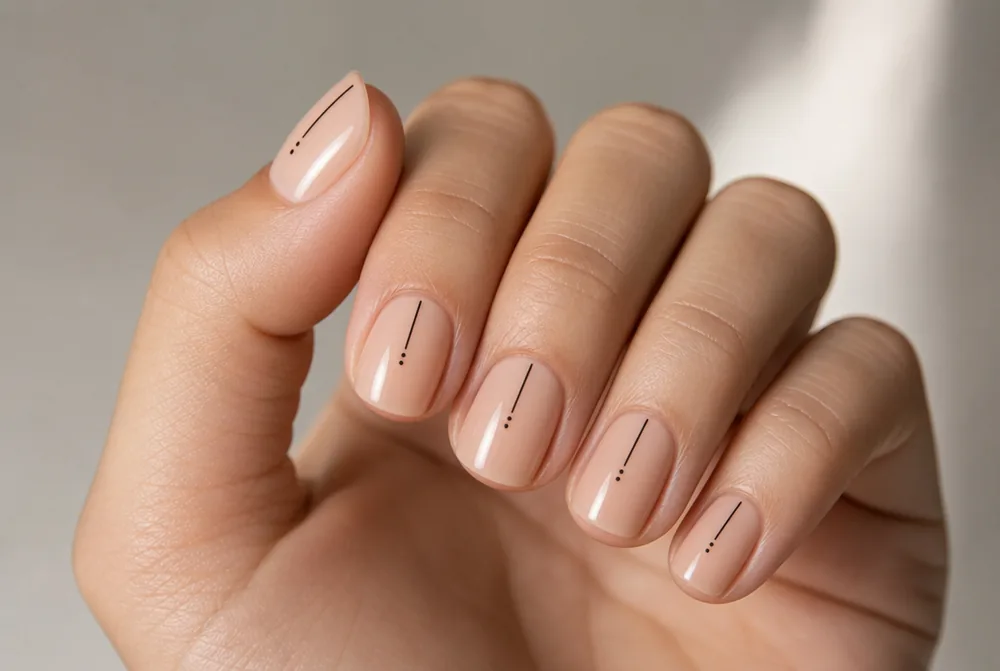
12. Dots and a Line
One thin line with two dots sitting off it, like a constellation. It’s the most editorial design here and it’s still two tools and ninety seconds. More in my minimalist nails guide.
13. Navy with White Dots
White on navy, which is the nautical version and reads sharper than black on white. Keep the dots small or it goes preppy. More in my blue nail designs guide.
14. Dotted Half Moon
An arc of dots following the curve of the cuticle. Grow-out improves it rather than ruining it, which is unusual for any pattern. Five or six dots in the arc.
15. Pink and Brown Dots
Brown dots on soft pink, which is an unexpected pairing that keeps turning up. It’s warmer than black on white and it suits golden hands. More in my brown nail designs guide.
16. Glitter Dots
Dots placed in fine glitter polish instead of a solid colour. The glitter blurs the edge, which forgives a shaky hand. More in my glitter nail designs guide.
17. Negative Space Dots
Dots left as bare nail within a painted colour, which is much harder and much cooler. Salons use a stencil or a small punch. Worth asking for once.
18. Dots Over Matte
Dots painted in clear glossy top coat over a matte base, so they only show when the light hits. It’s invisible in photos and obvious in person. More on the finish in my matte nails guide.
19. Dotted Toes
Dots on a pedicure, where they last four to six weeks and the bigger surface of a big toe makes them easy. It’s the best place to practise. More in my toe nail designs guide.
20. Two-Colour Dots
Dots in two colours scattered together, which stops the pattern reading as uniform. Keep both colours in the same family or it goes confetti. Two colours, not three.
21. Large Single Dot
One large circle placed off-centre, big enough to be a shape rather than a spot. It’s the most graphic thing here and it looks best on short square nails. Scale is the whole idea.
22. Dots on Short Squoval
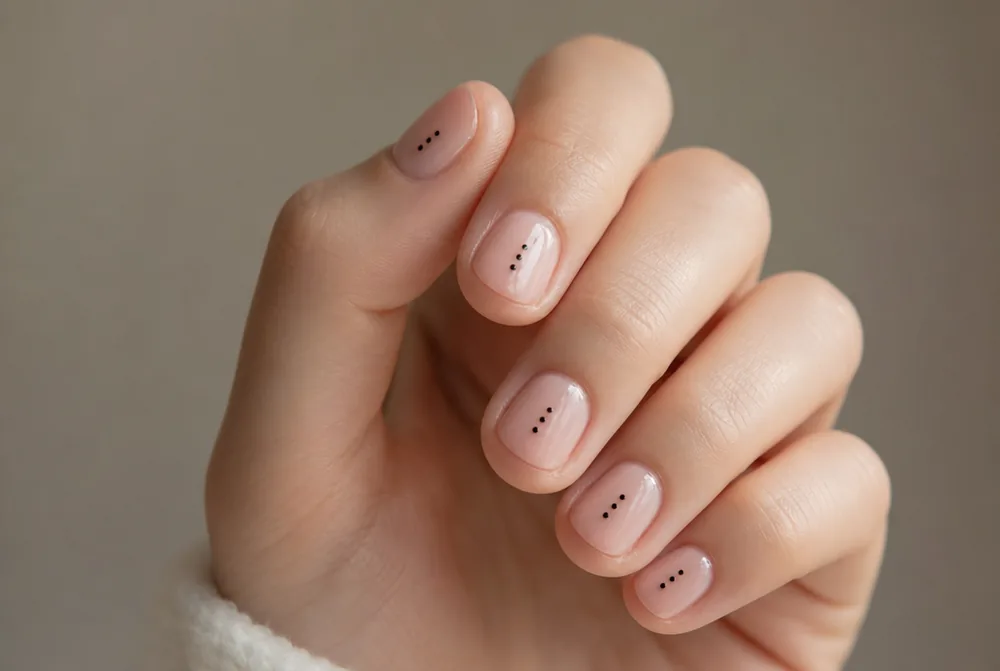
Three tiny dots on very short nails, which works better than most patterns at that length because dots need no room to run. Keep them very small. My extra short nail ideas post has more.
The spacing rule that decides everything
Every dotted manicure that looks childish fails on regularity, and every one that looks chic breaks it somewhere.
Evenly spaced dots of identical size is a printed pattern, and your eye recognises it as one instantly. That’s gift wrap, and it’s why polka dots have the reputation they do.
Vary the size and the pattern reads as intentional. Two large, three small, one medium, placed with different gaps between them. The variation doesn’t need to be dramatic; even a small size difference is enough to break the wallpaper effect.
The one exception is a dotted French tip, where even spacing along the smile line is exactly right. Regularity works when it’s clearly following a line, and fails when it’s filling a space.
Using a dotting tool properly
Dots are the one nail art skill that genuinely needs no practice, as long as you don’t press.
Dip the ball end into polish, touch it to the nail, and lift straight up. Do not press down; the polish transfers on contact and pressing spreads it into an oval. Touch and lift.
Re-dip between every dot. The first dot from a fresh dip is the biggest and each one after it is smaller, which is actually useful if you want graduated sizes, and a problem if you want consistency.
Let the base coat dry fully first. Dotting into a tacky base drags the colour underneath and gives you a smear instead of a circle. Two full minutes minimum with regular polish.
No dotting tool, no problem
A set of dotting tools is about $6 and worth owning, but everything on this page can be done with things already in the house.
A bobby pin is the best substitute. The rounded ball at the tip is almost exactly a medium dotting tool, and the two ends are usually slightly different sizes.
The head of a straight pin or a sewing needle gives you the smallest dots, and the end of a toothpick gives you the most irregular ones, which is sometimes what you want.
The blunt end of a paintbrush handle or a pencil eraser gives you large dots. Between a bobby pin and a pin head you can cover most of this page without buying anything.
Colour pairings that don’t read retro
Polka dots carry a lot of visual history, and the colour pairing decides which decade you land in.
High-contrast primary pairings read vintage: white on red, black on white, white on navy. These are lovely if that’s the intent, and dated if it isn’t. Keep the dots small to modernise them.
Tonal pairings read current. Deeper nude on nude, brighter white on milky white, brown on soft pink. Because there’s barely any contrast, the eye reads texture instead of spots.
Metallic dots sidestep the whole question. Gold or silver dots on any base read as jewellery rather than as a pattern, which is why they never look childish regardless of spacing.
How many nails to dot
The same restraint that applies to most nail art applies here, with one useful exception.
Two accent nails is the safe default. Eight plain and two dotted reads as a deliberate detail, and it’s also far cheaper if a salon is charging per nail for art.
The exception is micro dots. Very small, sparse, tonal dots can go on all ten without reading as busy, because at that scale they function as texture rather than as a pattern. That’s the version I’d wear across the whole hand.
A single dot per nail also works on all ten, for the same reason. One element repeated quietly is minimal; a full scatter repeated ten times is not. More on that balance in my nail art ideas post.
Dot size and nail length
The same dot that looks delicate on a long nail looks like a bruise on a short one, and scale is the adjustment almost nobody makes.
On short nails, use the smallest tool you have and place three dots at most. There is very little surface, so a dot that takes up a quarter of the nail dominates the whole thing. Micro dots and a single small dot are the two versions that work.
On medium nails everything on this page works, which is why medium is the length I would pick for any patterned design. There is room for variation in size without crowding.
On long nails you can go bigger and sparser, and the large single dot becomes a genuine option. What does not work at long length is a dense scatter of small dots, because the pattern starts reading as a texture rather than a design. My long nail designs post covers what suits that length.
Dots at the salon
Dots are the cheapest nail art you can ask for, which makes them good value if you want a design without a big add-on.
Most salons charge per nail for hand-painted art, commonly $3 to $8 each, and dots usually sit at the bottom of that range because they take seconds. Two accent nails is often a $6 to $10 add-on rather than the $40 a detailed design would cost.
Say the size out loud. Techs default to larger dots because they photograph better, and smaller almost always looks better in person. “Very small, scattered, different sizes” is the sentence that gets you the modern version.
Also say whether you want them even or irregular, because that single word changes the whole look and most techs will default to even spacing.
FAQ
How do you do polka dot nails without a dotting tool?
A bobby pin is the best substitute, since the rounded ball at the tip is close to a medium dotting tool and the two ends are usually different sizes. A pin head gives the smallest dots and a pencil eraser gives the largest. Dip, touch the nail, and lift straight up without pressing.
Why do my polka dots look like ovals?
Because you’re pressing down instead of just touching. The polish transfers on contact, and any pressure spreads it sideways into an oval. Touch the surface and lift straight up, and re-dip between every dot.
Are polka dot nails still in style?
Yes, in their tonal and micro forms. Low-contrast dots that read as texture and sparse scattered micro dots are both in current rotation, while evenly spaced high-contrast dots read vintage. The size and spacing decide whether it looks modern far more than the colour does.
How do you keep dots from smudging?
Let the base coat dry completely before dotting, at least two minutes with regular polish, since dotting into a tacky base drags the colour underneath. Then wait another two minutes before the top coat and float the brush over rather than pressing. Pressing a top coat onto fresh dots is what smears them.
Start with tonal micro dots on a nude base if you want the grown-up version, and white on red if you want the classic. And for more designs at this difficulty level, my beginner nail designs guide has plenty.
Evenly spaced dots across ten nails are surprisingly hard by hand. My nail stamping guide covers the version that does the spacing for you.