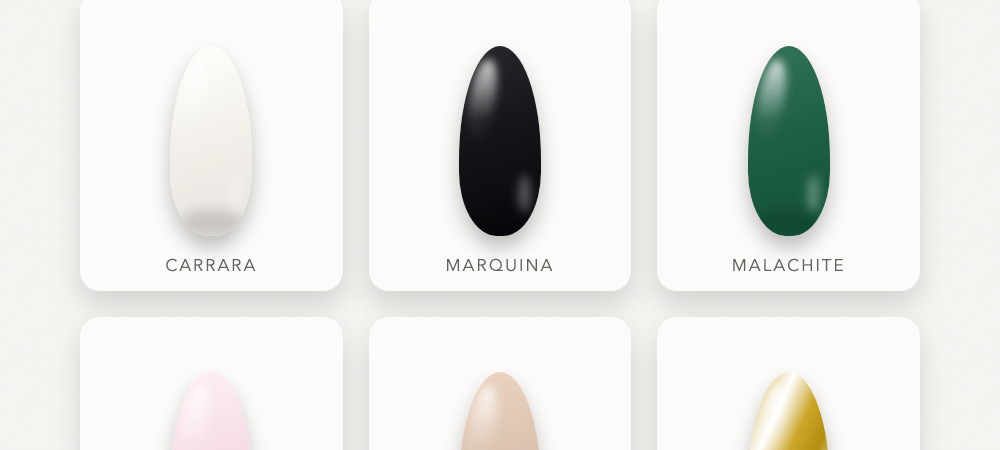
Marble nails are the design most likely to look expensive and most likely to look like a smudge, and the gap between the two is one rule: real stone is never symmetrical. Veining that runs evenly across every nail reads as a printed pattern. Veining that clusters in one corner and thins out to nothing reads as marble. That’s most of it.
Here are 22 marble nail designs from white Carrara to green malachite, plus the three techniques salons actually use, a saran wrap method that works at home, and what to say so your tech doesn’t default to something else. If you want the technique this shares most with, my aura nails guide covers soft-edge blending.
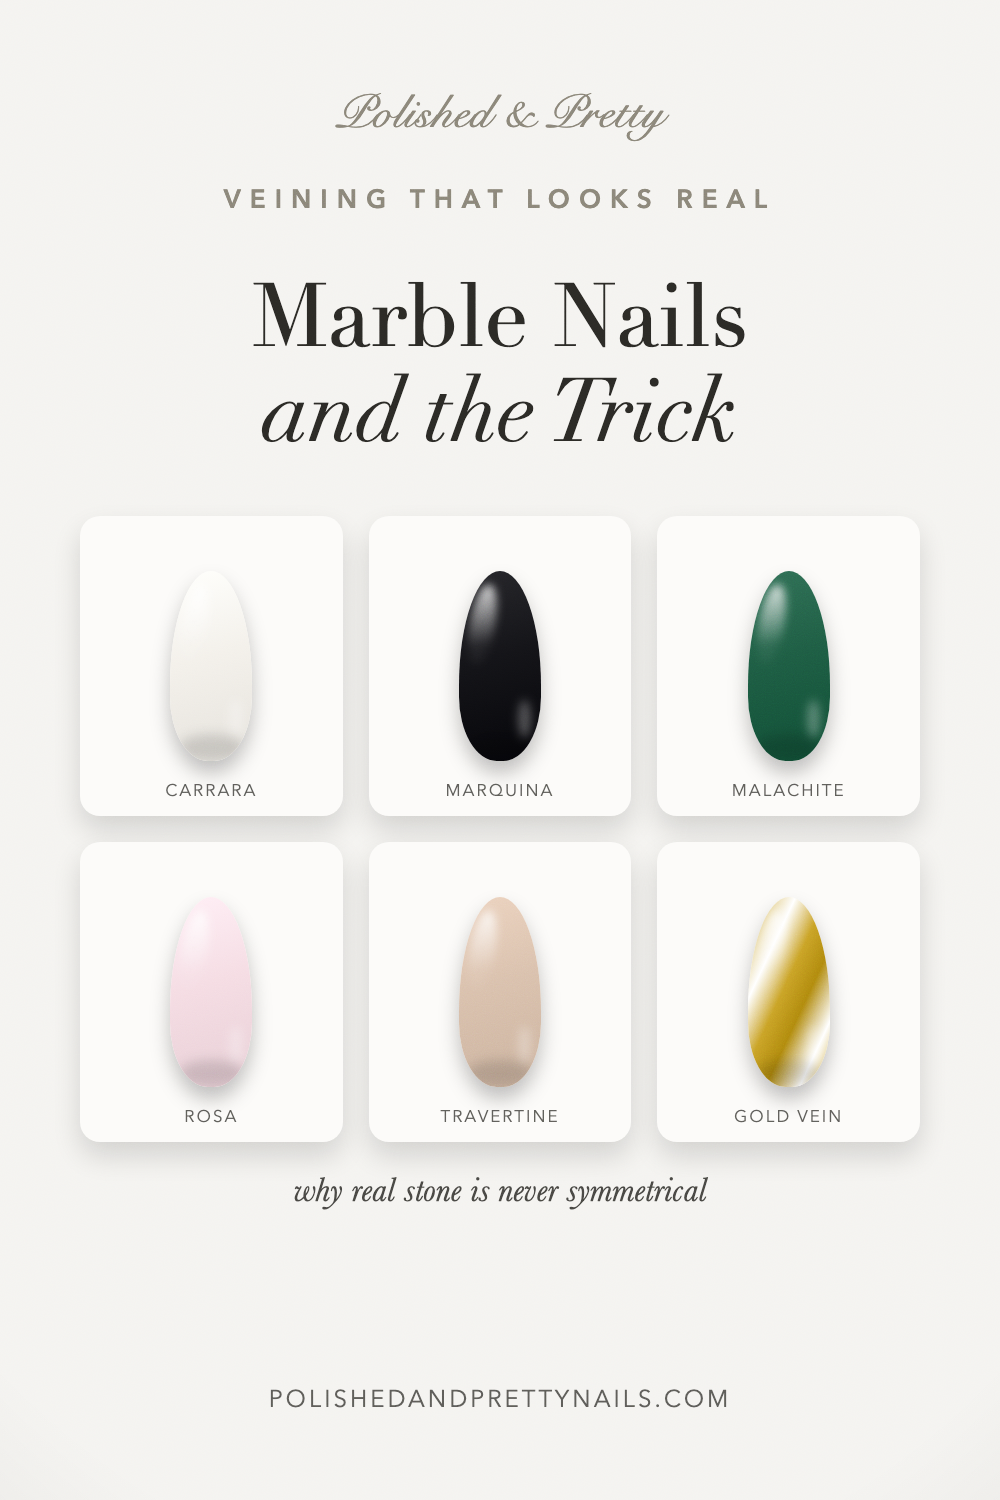
22 marble nail designs
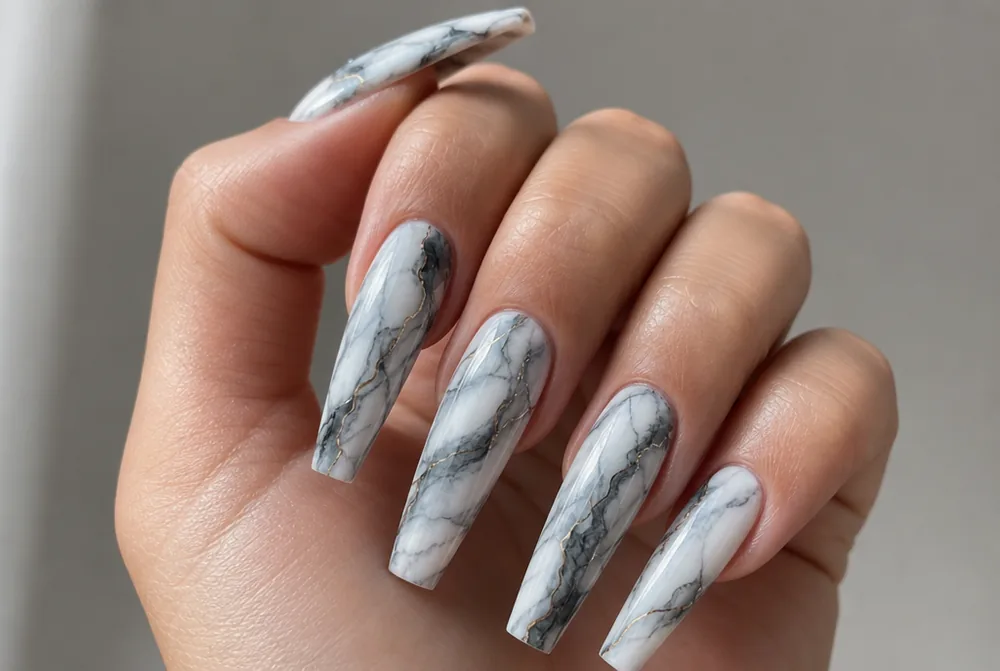
1. White Carrara
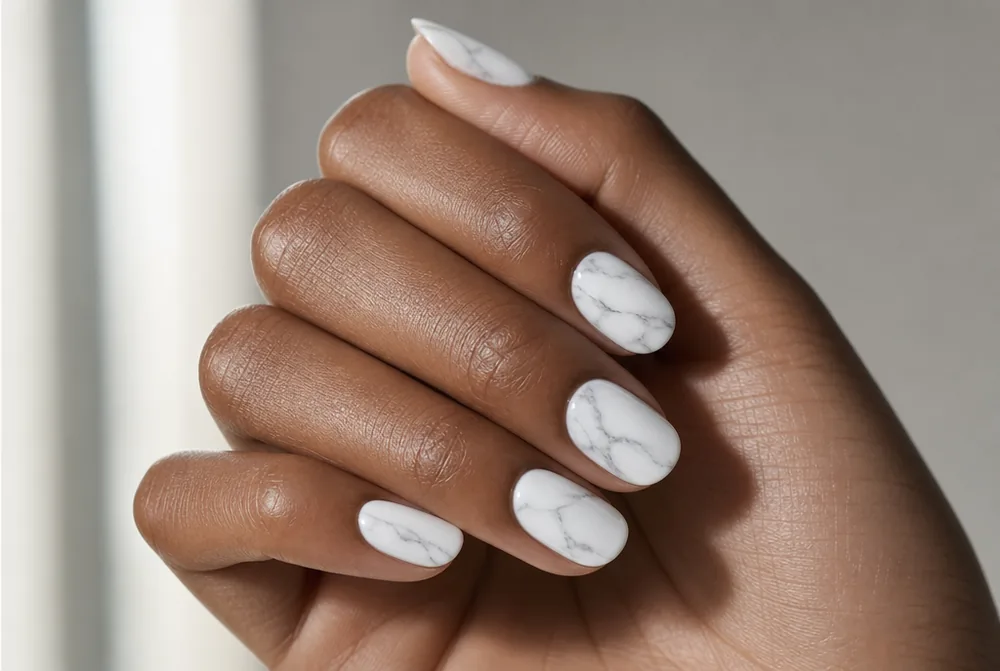
White base with fine grey veins running diagonally and clustering toward one corner. It’s the reference version and the one everyone pictures. Keep the veins thin; thick grey lines read as cracks rather than stone.
2. Milky Alabaster
The same idea with the contrast turned right down, so it reads as alabaster rather than Carrara. Low contrast is what makes marble look expensive. More on the base in my milky white nails guide.
3. Gold Vein Marble
White base with the veining done in metallic gold instead of grey. It’s the dressiest marble here and it needs no glitter at all. More placements in my gold nail designs post.
4. Black Marquina
Black base with white veins, which is the highest-contrast marble and the hardest to keep from looking like a crack. Fewer veins than you think. More in my black nail ideas post.
5. Green Malachite
Banded light and dark green swirled in concentric rings, which is malachite rather than marble but everyone calls it marble. It’s the most striking design on this page. More in my emerald green nails guide.
6. Pink Rosa Marble
A soft pink base with white veining, like Rosa Portogallo. It’s the friendliest marble and the one that suits fair hands best. More shades in my pink nail designs post.
7. Blue Agate
Layered blue and white bands like a sliced agate, with a gold edge on one side. It’s more work than most marbles and it looks genuinely custom. More in my blue nail designs guide.
8. Marble Accent Nails Only
Eight plain nude nails and two marbled. This is how I’d wear it, because ten marbled nails is a lot of pattern and two reads as a deliberate detail. Ring finger and thumb.
9. Grey Marble
Grey on grey, which is tonal and about as understated as pattern gets. It’s the office version of a marble manicure.
10. Marble with Chrome Overlay
A finished marble with pearl chrome buffed over it, so the veining sits under a wet sheen. It looks like polished stone rather than painted stone. Needs gel for the chrome.
11. Burgundy Marble
Deep wine with gold and cream veins, which is the autumn version. Warm marble is rarer than cool marble and it stands out for that reason. Full range in my burgundy nails guide.
12. Marble French Tip
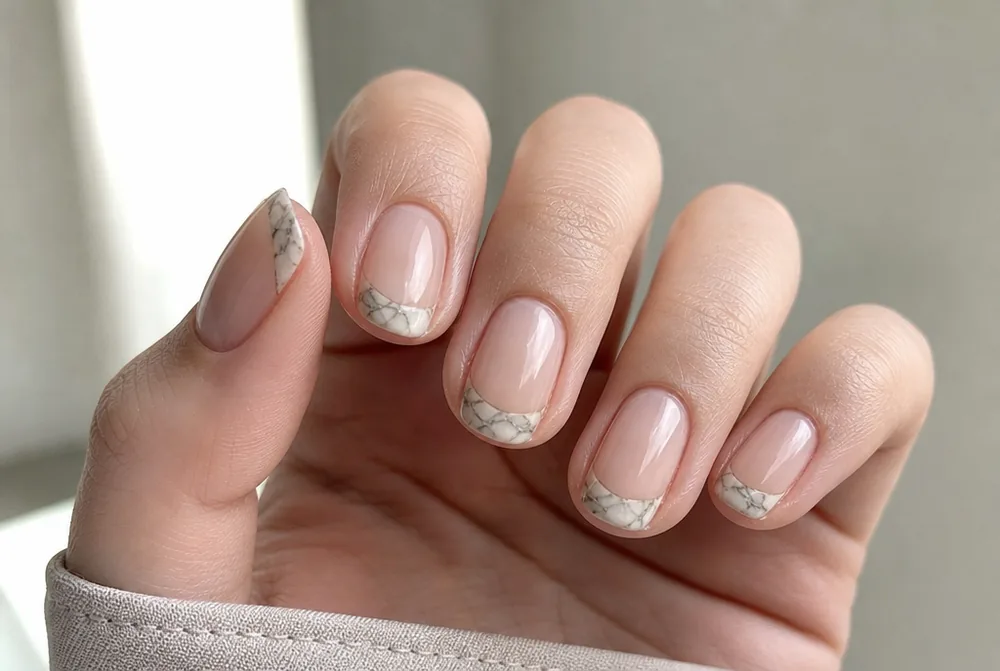
A French where the tip is marbled instead of solid white. It’s the most work-appropriate way to wear pattern. Keep the tip thin or the veining gets crowded.
13. Marble with Gold Foil Edge
A marble nail with torn gold leaf along one edge, like the gilded rim on an agate slice. The irregular edge is the point. Tear the foil rather than cutting it.
14. Terrazzo
Small irregular chips of colour scattered on a cream base rather than veining. It’s the playful cousin of marble and it’s much easier to do by hand. Vary the fleck sizes.
15. Marble Toes
Marble on a pedicure, where it lasts four to six weeks. The bigger surface of a big toe is also the easiest place to practise veining. More in my toe nail designs guide.
16. Smoke Marble
Blurred grey smoke instead of defined veins, so there are no hard lines anywhere. It’s the softest marble and the most forgiving to attempt. Blooming gel or a sponge, not a brush.
17. Marble with Micro French
Marble with a hairline of white right at the tip. The one crisp line frames all the softness behind it. It’s the detail that makes a home attempt look finished.
18. Brown Travertine
Warm beige with soft brown mottling, like travertine or unpolished stone. It’s the most neutral thing here and it goes with everything. More in my brown nail designs guide.
19. Marble with Rhinestone
One small crystal set where two veins cross, like a flaw in the stone. One stone, one nail. It’s restraint that sells this rather than quantity.
20. Matte Marble
Marble under a matte top coat, which turns polished stone into raw stone. It also hides an imperfect blend, because there’s no shine tracing the edges. More on the finish in my matte nails guide.
21. Marble on Short Square
Marble on a short square, which needs finer veins than a long nail does or it crowds. Two or three veins per nail, maximum. My square nail ideas post has more at that shape.
22. Long Coffin Marble
Long coffin is where marble belongs, because the flat wide tip keeps the pattern readable all the way to the end. If you have length, use it here. Shape details in my coffin nail designs guide.
The three ways marble gets made
These give visibly different results, which is why “marble nails” produces such different manicures in different salons.
Freehand veining is a fine-liner brush drawing the lines directly. It gives the most control and the most realistic result, and it’s the most skill-dependent. This is what you’re paying for at a good salon.
The saran wrap method presses crumpled plastic wrap onto wet polish, which lifts colour away in an irregular pattern. It produces a mottled stone look rather than distinct veins, and it’s genuinely foolproof at home.
Water marbling drops polish onto water, drags a toothpick through it, and dips the nail in. It gives the most dramatic swirls and it is fiddly, wasteful, and inconsistent. I’d skip it unless you enjoy the process.
The saran wrap method, step by step
This is the one I’d tell anyone to start with. It takes about fifteen minutes and it’s very hard to get wrong.
Paint the nail in your vein colour first, the darker one, and let it dry completely. Then paint the base colour over the top, and while it’s still wet, press a crumpled piece of plastic wrap onto it and lift straight off.
The wrap lifts away patches of the wet top colour and reveals the darker layer underneath in an irregular pattern. Press once or twice, not five times, and lift straight up rather than dragging.
Once dry, add two or three thin veins freehand with a liner brush if you want more definition. Then two coats of top coat. The wrap does the randomness and the brush does the structure, which is why the combination beats either alone.
Veining that reads as stone
Four rules cover almost every bad marble I’ve seen, and they’re all about breaking symmetry.
Veins should cluster, not spread. Real stone has busy areas and empty areas. Distributing veins evenly across the nail is what makes it read as wallpaper, so put most of them in one corner and leave the opposite corner nearly bare.
Vary the thickness within a single vein. A line that starts thick and thins to nothing looks natural; a line of constant width looks drawn. Lift the brush gradually as you finish each stroke.
Branch, don’t cross. Veins in stone split off each other at shallow angles rather than crossing in Xs. Two or three main lines with small branches beats a grid every time.
Keep every nail different. Ten identical marbled nails is the fastest way to make the whole set look printed. Change the direction and the density on each one.
What to ask for at the salon
Marble is one of the highest-variance requests on a salon menu, and a photo matters more here than for almost any other design.
Name the stone rather than the colour. “Carrara, white with fine grey veins” or “black with white veining” leaves far less room than “marble nails”. If you want the soft version, say “smoke marble, no hard lines”.
Say how many veins. Techs default to more because it reads as more work, and fewer almost always looks better. “Two or three veins per nail, clustered to one side” is a useful sentence.
Expect a per-nail art charge, commonly $5 to $10 each on top of a $45 to $65 gel set. This is exactly why two accent nails is the right call: it’s a $15 add-on instead of a $70 one, and it looks better.
Which base colours carry veining
Not every base takes veining well, and the wrong pairing is why some marble sets look muddy however neat the lines are.
Pale bases with a slightly darker vein are the safest combination. White with grey, cream with taupe, milky pink with white. The low contrast is exactly what makes it look like stone rather than line art.
Very dark bases need a metallic vein rather than a white one. White on black reads as a crack, while gold on black reads as a mineral seam. This is the single most useful substitution here.
Mid-tone bases are the hardest, because a vein either disappears into them or fights them. If you want marble on a mid-tone, go tonal: a slightly deeper version of the same colour, as covered in my nail art ideas post.
FAQ
How do you do marble nails at home?
The easiest method is saran wrap: paint the darker vein colour first and let it dry, then paint your base colour over it and press crumpled plastic wrap into the wet polish and lift straight off. That reveals the layer underneath in an irregular pattern. Add two or three freehand veins with a liner brush afterward if you want more definition.
Why do my marble nails look fake?
Usually because the veins are evenly distributed and all the same thickness, which reads as a printed pattern rather than stone. Cluster most of the veining into one corner and leave the opposite corner nearly bare, and let each line taper from thick to nothing. Also make every nail different rather than repeating the same pattern ten times.
How much do marble nails cost?
Hand-painted marble is usually charged per nail, commonly $5 to $10 each on top of a $45 to $65 gel set. Doing two accent nails instead of all ten brings that from around $70 down to about $15, and two accent nails genuinely looks better than a full set. Ask for the price per nail when you book.
What colour marble nails are most popular?
White with fine grey veining is the most requested by a wide margin, followed by white with gold veining for anything dressy. Green malachite and black with white veining are the two statement versions. Low-contrast pairings look more like real stone than high-contrast ones do.
Start with two accent nails in white Carrara over a nude set, since it’s the cheapest way in and the easiest to like. And if you want the same softness with no lines at all, my aura nails guide is the next thing to try.
Veining is easier to stamp than to paint if you want consistency across ten nails, and my nail stamping guide covers that. For veining that does not try to imitate real stone, see abstract nails.