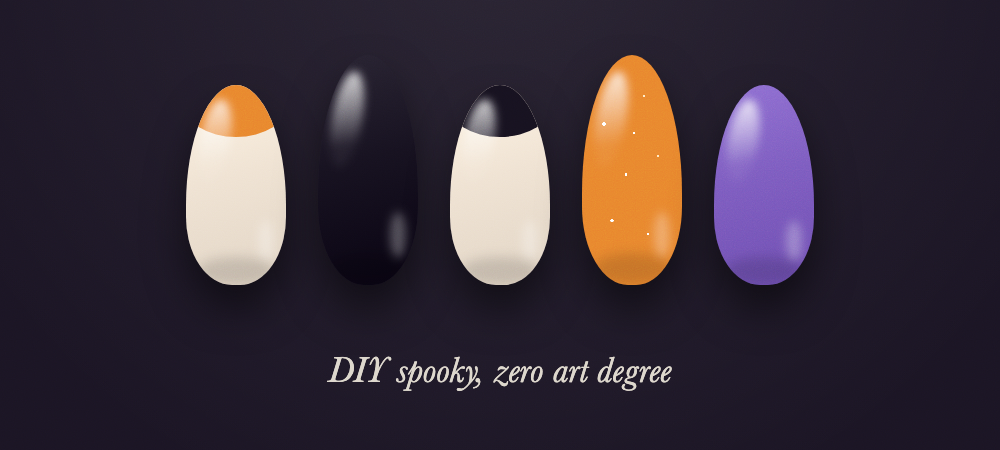
Simple Halloween nails are the only kind I do anymore. I spent one miserable October night attempting a full haunted-house mural on ten nails, got to nail four, and soaked the whole thing off before bed. Never again. The truth nobody posts: the Halloween manicures that actually look good on real hands are the easy ones, because a crisp ghost dot beats a smeared witch portrait every single time.
Every idea below is doable at home with drugstore polish and things you already own, mostly bobby pins, tape, and patience. Each one lists the exact tools and an honest time estimate, including drying. After the list: the 5-item kit that covers all 22 designs for under $25, my stickers vs freehand take (zero shame in stickers), and how to keep things office-legal. If you’d rather see the ambitious salon-level stuff, my Halloween nail designs roundup is where the murals live.
22 simple Halloween nails, start to finish
1. One Spooky Accent Nail
Nine nude nails, one glossy black. That’s it, and it genuinely reads as Halloween in context. Tools: a nude polish, a black polish, top coat. Time: 15 minutes. This is the gateway drug to everything else on this list.
2. Polka-Dot Spiders
Make a black dot with a bobby pin, then drag eight tiny legs out with the pin’s tip. Instant spider, and wobbly legs look more spidery, not less. Tools: black polish, bobby pin, nude base. Time: 25 minutes. Put spiders on two nails max so mistakes stay contained.
3. Candy Corn Stripes With Tape
White tips, orange middles, yellow bases, with regular Scotch tape as your straight-line insurance. The catch is patience: each stripe must dry fully before you tape over it or you’ll peel it right off. Tools: three polishes, tape, scissors. Time: 40 minutes, most of it waiting. Quick-dry top coat between layers speeds it up.
4. Ghost Dots On Nude
A white dot dragged downward becomes a tiny ghost; add two black micro-dot eyes with a toothpick. These are the most charming simple Halloween nails I know and they take no artistic talent whatsoever. Tools: white and black polish, bobby pin, toothpick. Time: 20 minutes.
5. Black Tips Only
A regular french manicure with black tips instead of white. It’s Halloween’s most wearable trick because on November 1st it’s still just a chic manicure. Tools: sheer base, black polish, steady hand or tip guides. Time: 20 minutes.
6. Orange-Black Alternating
Orange, black, orange, black, orange. No art, no tools beyond two bottles, and it photographs like you tried much harder. Tools: orange creme, black creme. Time: 15 minutes. Sinful Colors makes both for about $3 each.
7. Glow Top Coat Over Anything
One coat of glow-in-the-dark polish over whatever manicure you already have. Invisible at the office, radioactive at the party. Tools: a glow topper (about $8 online, Tony Moly and Beetles both make one). Time: 5 minutes. Charge it under a lamp before you head out; the glow lasts an hour or two and recharges under any bright light.
8. Bat Sticker Art
Paint a pale base, press on bat stickers, seal with top coat so the edges never lift. Nobody at the party will know or care that you didn’t paint them. Tools: base color, sticker sheet ($4 to $6 on Amazon), top coat. Time: 10 minutes.
9. Minimal Web On One Nail
A web tucked into one corner of one nail: three straight lines fanning from the corner, two curved lines connecting them. Corners hide shaky starts, which is why this beats a full-nail web for beginners. Tools: white polish, toothpick or thin liner brush. Time: 25 minutes.
10. Blood-Drip Tips With A Bobby Pin
Paint a red line along the tip, then pull two or three drips downward with a bobby pin ball. Uneven drips of different lengths look the most convincing, so sloppiness is an asset here. Tools: nude base, cherry red polish, bobby pin. Time: 25 minutes. A jelly red gives the most realistic gore.
11. Jack-O’-Lantern Accent
One orange nail gets two black triangle eyes and a zigzag mouth; the rest stay solid orange. Triangles are just three short strokes, easier than any curve. Tools: orange polish, black polish, toothpick. Time: 30 minutes including dry time. Practice the face on paper first.
12. Mummy Tape Stripes
Black base, then white stripes crossing at random angles like loose bandages, plus two white dot eyes with black centers. Random is the goal, so this design forgives everything. Tools: black and white polish, striping brush or the white bottle’s own brush, bobby pin. Time: 30 minutes.
13. Candy Corn Skittle
All the candy corn colors, none of the striping: white, orange, and yellow distributed one color per nail. It’s design number 3 for people who don’t own tape or patience. Tools: three cremes. Time: 15 minutes.
14. Stars And Moons On Navy
Midnight navy base with gold star and moon stickers, sealed flat. It’s witchy rather than gory, which makes it the Halloween manicure you can wear to a baby shower. Tools: navy polish, celestial sticker sheet, top coat. Time: 15 minutes.
15. Witch Stocking Pinky
Solid black hand, one pinky striped purple and black like witch tights. The pinky is tiny, so even freehand stripes stay respectable. Tools: black and purple polish, thin brush or tape. Time: 20 minutes.
16. “Boo” Letter Stickers
Letter stickers spelling B-O-O across three nails on a white or nude base. Ten minutes, one clean joke of a manicure. Tools: base polish, letter stickers, top coat. Time: 10 minutes. Nail-specific letter decals lie flatter than craft-store ones.
17. Eyeball Dots
Stack three dots: big white, medium green, small black. Congratulations, that’s an eyeball, and a scatter of them over lavender or nude looks like expensive salon art. Tools: three polishes, bobby pin in two sizes (bend one for the tiny dot). Time: 25 minutes.
18. Matte Black With One Glossy Web
Matte black everywhere, then a web drawn in clear glossy top coat on one nail. The design only appears when light hits it, which is the most elegant trick in this whole list. Tools: black polish, matte topper, glossy top coat, thin brush. Time: 20 minutes.
19. Rising Moon Half-Circles
A white half-moon at the base of each black nail, like moonrise on ten tiny horizons. Paper hole-reinforcement stickers from any office drawer give you a perfect curve to paint against. Tools: black and white polish, hole reinforcement stickers. Time: 20 minutes.
20. Slime Drip Green
Same bobby-pin drip technique as number 10, but neon green over black for toxic-slime energy instead of gore. Louder than the blood drips and weirdly more office-safe, since slime reads playful. Tools: black polish, neon green polish, bobby pin. Time: 25 minutes.
21. Cobweb Glitter Topper
A silver flake glitter over sheer nude catches light like cobwebs in a doorway. It’s Halloween by suggestion only, so it works for people whose entire costume is “black sweater.” Tools: one glitter topper, about $6. Time: 10 minutes.
22. Pumpkin Creme, No Art
Simple Halloween nails don’t get simpler than this: two coats of burnt pumpkin orange, nothing else. Solid orange in late October is understood; it’s seasonal shorthand, no art required. Tools: one polish, top coat. Time: 15 minutes. This one moonlights beautifully as part of a short fall nails rotation through November.
The 5-item Halloween nail kit under $25
Every design above comes out of the same five things. One: black creme polish, $3 to $5 (Sinful Colors Black On Black is fine, truly). Two: white creme, another $3 to $5, and make it an opaque one; sheer white is useless for art. Three: orange creme, $3 to $5. Four: a quick-dry top coat, $6 to $8, with Sally Hansen Insta-Dri or Seche Vite doing the sealing and the sticker-smoothing. Five: one sticker sheet of bats, stars, or letters for $4 to $6. A variety pack covers both the bat and star designs above for the same money, so grab that one if you’re choosing.
Total: roughly $19 to $29 depending on brands, and under $25 if you skip one polish you already own. Your “tools” are free: bobby pins for dots and drips, toothpicks for micro details, Scotch tape for stripes, hole-punch reinforcement stickers for curves. A real dotting tool set costs $5 if you get hooked, but don’t buy it for your first attempt. If you’re starting from absolute zero, my simple nail designs for beginners guide covers the base skills all of this sits on.
Stickers vs freehand (no shame either way)
I need to say this louder every October: stickers are not cheating. A $5 sheet of bat decals under top coat is indistinguishable from freehand at conversation distance, and it takes ten minutes instead of forty. Salons use decals constantly. They just don’t mention it. Decal sheets even come in web, drip, and jack-o’-lantern patterns now, so the line between “sticker” and “hand-painted art” is mostly marketing anyway.
Freehand earns its place for organic shapes where wobble is a feature: drips, spider legs, ghost bodies, mummy wraps. Sticker territory is anything geometric or tiny: letters, stars, bats, perfect circles. My honest system is a hybrid. Freehand the forgiving stuff on two accent nails, sticker everything precise, and seal the whole hand with one thick coat of quick-dry top coat so nothing peels in the shower. The only real mistake is skipping the top coat; unsealed stickers lift at the edges within a day and then snag on every sweater you own.
Simple Halloween nails you can wear to work
The office question comes up every year and the answer is the accent-nail principle: keep 80 percent of the manicure neutral and put the holiday on one or two nails. The black french tips (number 5), matte black with glossy web (18), stars on navy (14), cobweb glitter (21), and solid pumpkin (22) all pass in any workplace I’ve ever set foot in. Same logic I use for classroom-safe back to school nails: neutral base, one deliberate moment of personality.
Skip the gore at work. Blood drips read very differently across a conference table than across a party punch bowl, and glow top coat is the loophole anyway: invisible under office lights, full Halloween after dark. If your job is client-facing and conservative, do the cobweb glitter and call it “festive shimmer.” Nobody has ever HR’d a glitter topper. And if you want it both ways, paint the office-safe version on Monday, then add one spooky dot-design accent nail on Friday night. Ten extra minutes, fully reversible.
FAQ
How can I do Halloween nails without nail art skills?
Use dots, stickers, and tape instead of freehand painting. A bobby pin makes perfect dots, which builds ghosts, spiders, and eyeballs; tape makes straight stripes; stickers handle anything detailed. Start with a one-color accent nail or an orange-and-black alternating set, which need no art at all, then work up to dot-based designs. Seal everything with top coat.
What Halloween nails can I wear to work?
Black french tips, solid burnt orange, dark navy with small star accents, and glitter toppers are all office-safe Halloween nails. The rule of thumb: neutral base, holiday details limited to one or two nails, no gore. Glow-in-the-dark top coat is the stealth option, since it looks like plain polish indoors. Save blood drips and eyeballs for the weekend party.
How long before Halloween should I get my nails done?
Book a gel manicure 3 to 5 days before Halloween, or paint regular polish 1 to 2 days out. Gel lasts two-plus weeks, so an appointment around October 26th covers every party and still looks fresh on the night. Regular polish starts showing tip wear around day four, so paint that closer to the event. Press-ons can go on the day of in about fifteen minutes.
Once the candy is gone, don’t take the orange off; recolor it. My short fall nails roundup carries the same easy energy straight through November, and the fall nail ideas 2026 list has the bigger trends worth planning a salon visit around.