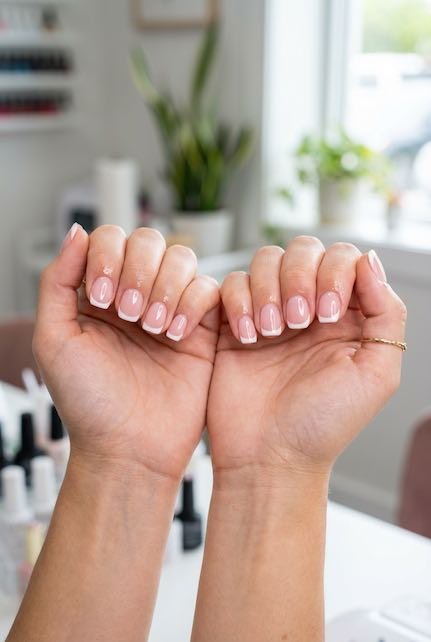
French manicures have remained a timeless classic in the nail art world for decades. Their elegant simplicity and versatility make them perfect for any occasion, from everyday wear to special events. While salon visits can be expensive and time-consuming, mastering the art of French manicures at home can save you money and give you the flexibility to perfect your nails whenever you want.
Essential Tools and Products You’ll Need
Before diving into the technique, it’s crucial to have the right tools. Here’s what you’ll need for a professional-looking French manicure:
- Base coat – A quality base coat like OPI Natural Nail Base Coat protects your nails and helps polish adhere better
- Nude or pink polish – Choose a shade that complements your skin tone. Essie Ballet Slippers is a classic choice
- White polish – For the tips, opt for an opaque white like Sally Hansen Hard as Nails Xtreme Wear in White On
- French manicure guides – Nail Art French Tip Guides ensure perfectly curved tips
- Top coat – A long-wearing top coat like Seche Vite Dry Fast Top Coat is essential for durability
- Nail file and buffer – Glass nail files are gentler on nails
- Cuticle pusher and oil – Keep cuticles healthy with CND Solar Oil
- Nail polish remover and cotton pads
- Small cleanup brush – For fixing mistakes
Preparing Your Nails for the Perfect French Manicure
Preparation is key to achieving a long-lasting manicure. Start by removing any existing polish completely. Shape your nails using a file, moving in one direction to prevent splitting. The ideal shape for French manicures is slightly rounded or square with rounded edges.
Next, soak your fingertips in warm, soapy water for 5 minutes to soften the cuticles. Gently push back your cuticles using a cuticle pusher, being careful not to damage the nail bed. Apply cuticle oil and massage it in to nourish the nail area.
Buff the surface of your nails lightly to create a smooth canvas. This step helps the polish adhere better and creates a more professional finish. Wipe each nail with polish remover to remove any oils or residue.
Step-by-Step French Manicure Application
Step 1: Apply the Base Coat
Start with a thin layer of base coat on all nails. This protective layer prevents staining and helps your manicure last longer. Allow it to dry completely before proceeding.
Step 2: Apply the Base Color
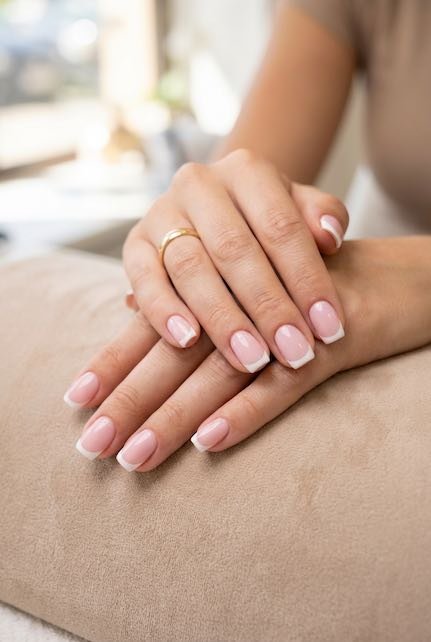
Choose your base color – traditionally a sheer pink or nude shade. Apply thin, even coats rather than one thick coat. Start with a stroke down the center of the nail, then paint each side. Two thin coats usually provide the best coverage. Let each coat dry thoroughly.
Step 3: Create the White Tips
This is where French manicure guide strips become invaluable. Place the guides about 3-4mm from the nail tip, ensuring they’re positioned evenly across all nails. Press down firmly to prevent polish from bleeding underneath.
Apply the white polish to the exposed tip area using smooth, confident strokes. Don’t overload the brush – it’s better to do two thin coats than one thick one. Remove the guides while the polish is still slightly wet for cleaner lines.
Step 4: Clean Up and Perfect
Dip a small brush in nail polish remover to clean up any mistakes or uneven lines. This step makes the difference between a DIY and professional-looking manicure.
Step 5: Seal with Top Coat
Apply a generous layer of top coat over the entire nail, making sure to cap the free edge by running the brush along the tip. This sealing technique significantly extends the life of your manicure.
Pro Tips for Long-Lasting Results
Thin coats are key: Multiple thin coats last longer than fewer thick coats and dry faster with fewer bubbles.
Cap the edges: Run the brush along the free edge of your nail with both color and top coat to prevent chipping.
Avoid hot water: For 12 hours after application, avoid hot showers or baths as heat can cause polish to lift.
Reapply top coat: Every 2-3 days, apply a fresh layer of top coat to maintain shine and protection.
Wear gloves: When cleaning or doing dishes, protect your manicure with rubber gloves.
Use cuticle oil daily: Hydrated nails and cuticles help maintain the overall appearance of your manicure.
Modern Twists on the Classic French Manicure
While the traditional pink-and-white combination remains popular, modern variations offer creative alternatives:
- Colored tips: Replace white with pastels, metallics, or bold colors
- Glitter accent: Add sparkle to the tips for special occasions
- Reverse French: Paint the moon (base) of the nail instead of the tip
- Double French: Add a thin line of contrasting color between the base and tip
- Ombré French: Blend the tip color gradually into the base
Troubleshooting Common French Manicure Problems
Uneven smile lines: Practice makes perfect, but using guides or French manicure pens can help achieve consistent results.
Streaky white polish: Ensure your white polish isn’t too old or thick. Add a drop of nail polish thinner if needed.
Quick chipping: This usually indicates inadequate prep work or skipping the base/top coat steps.
Yellowing: Use a quality base coat and avoid cheap white polishes that may yellow over time.
Maintaining Your French Manicure
With proper care, a home French manicure can last 7-10 days. Moisturize your hands and nails daily, being gentle during activities that might cause chipping. If minor chips occur, touch them up immediately to prevent further damage.
Consider investing in a UV or LED lamp and gel polish system for even longer-lasting results. Gel French manicures can last up to three weeks with minimal chipping.
Conclusion
Mastering the French manicure at home takes practice, but with the right tools and techniques, you can achieve salon-quality results. Remember that preparation and patience are just as important as the polish application itself. Start with quality products, take your time, and don’t be discouraged if your first attempts aren’t perfect. With regular practice, you’ll be creating flawless French manicures that last just as long as professional ones, all while saving time and money.
And if a manicure that holds up without much fuss is what you’re after, come browse my favorite short gel nails looks next. Gel on short nails is honestly the most low-effort combo I know.