The French manicure has remained one of the most beloved and versatile nail styles for decades.
From its humble beginnings in Hollywood to becoming a global phenomenon, this timeless look continues to evolve while maintaining its elegant appeal. Whether you’re a nail art novice or a seasoned professional, this comprehensive guide will walk you through everything you need to know about creating perfect French manicures at home or understanding what to expect at the salon.
The History and Evolution of French Manicures
Despite its name, the French manicure actually originated in Hollywood in 1976. Jeff Pink, founder of Orly nail polish, created this look to solve a common problem on movie sets: actresses needed a versatile nail style that would complement multiple costume changes without requiring constant repainting.
The neutral base with white tips proved to be the perfect solution, offering a clean, polished appearance that enhanced the natural beauty of nails without competing with wardrobe choices.
The style gained its “French” moniker when Pink took the concept to fashion runways in Paris, where it was met with overwhelming enthusiasm. French models and fashion designers embraced the sophisticated simplicity, and the name stuck. Since then, the French manicure has undergone countless interpretations while maintaining its core aesthetic principle: enhancing the natural nail with a clean, defined tip.
Understanding the Classic French Manicure
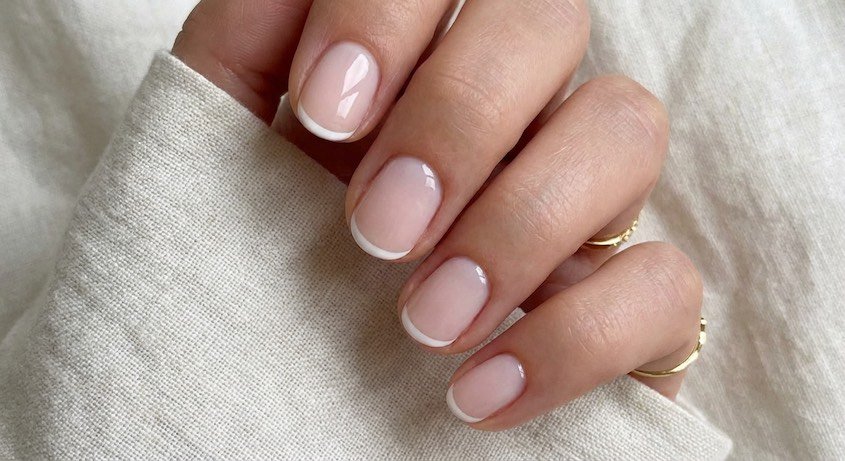
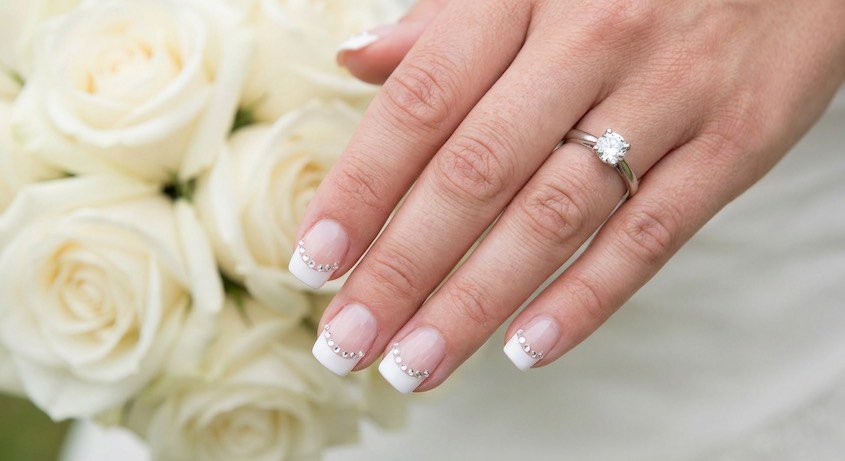
The traditional French manicure consists of three essential elements: a nude or pink base color, white tips, and a glossy topcoat. This combination creates the illusion of naturally perfect nails with enhanced white tips that appear clean and healthy. The key to achieving the classic look lies in precision and proportion – the white tip should follow the natural smile line of your nail and typically extends no more than 3-4 millimeters from the edge.
Essential Tools and Products for DIY French Manicures
Before beginning your French manicure journey, gather these essential tools and products:
- Base coat: Protects natural nails and prevents staining
- Nude or pink polish: Choose a shade that closely matches your skin tone
- White polish: Opt for an opaque formula for best coverage
- Top coat: Seals the design and adds shine
- French manicure guides or tape: Helps create precise tip lines
- Small brush or cleanup pen: For correcting mistakes
- Nail file and buffer: For shaping and smoothing
- Cuticle pusher and nipper: For grooming
- Nail polish remover and cotton swabs: For cleanup
- Hand cream and cuticle oil: For finishing touches
Step-by-Step Guide to Creating a Classic French Manicure
Step 1: Nail Preparation
Begin by removing any existing polish with acetone-free nail polish remover. Soak your hands in warm, soapy water for 5 minutes to soften cuticles. Gently push back cuticles using a cuticle pusher, and carefully trim any excess skin with cuticle nippers. Shape your nails using a file, working in one direction from the outer edge toward the center. The ideal shape for French manicures is slightly rounded or square with rounded edges, as these shapes showcase the white tips beautifully.
Step 2: Creating the Perfect Canvas
Buff the surface of your nails gently to create a smooth base. Remove any oils or residue by wiping each nail with nail polish remover or rubbing alcohol. Apply a thin layer of base coat to all nails, making sure to cap the free edge by running the brush along the tip. Allow the base coat to dry completely, which typically takes 2-3 minutes.
Step 3: Applying the Base Color
Choose a nude or pink polish that complements your skin tone. Apply the first thin coat starting from the base of the nail, pushing the brush slightly toward the cuticle before pulling it up through the center. Follow with strokes on each side, ensuring even coverage. Apply a second coat once the first is touch-dry, usually after 5 minutes. The base color should be opaque enough to create a uniform canvas but sheer enough to maintain a natural appearance.
Step 4: Creating the White Tips
This is the most challenging part of the French manicure. Wait until the base color is completely dry before proceeding. If using guide strips, apply them below your natural nail’s smile line, ensuring they’re firmly pressed down to prevent polish from seeping underneath. Apply white polish to the tips in thin, even strokes. Start from one side and sweep across to the other in one smooth motion if possible.
For freehand application, steady your hand on a flat surface and use the brush to create a gentle curve following your natural smile line. Don’t worry about achieving perfection on the first try – you can clean up the lines later. Remove guide strips immediately after applying white polish while it’s still wet to prevent peeling.
Step 5: Perfecting and Sealing
Once the white tips are dry, use a small brush dipped in nail polish remover to clean up any uneven lines or mistakes. Apply a generous layer of top coat to seal your design, again remembering to cap the free edge. This final step not only adds shine but also helps your manicure last longer.
Modern Variations and Creative Twists
While the classic French manicure remains popular, modern interpretations have exploded in popularity, offering endless possibilities for personal expression. These contemporary versions maintain the fundamental concept of accentuated tips while introducing new colors, textures, and design elements.
Colorful French Tips
Replace traditional white tips with bold colors for a playful twist. Popular choices include:
- Pastel French: Soft lavender, mint green, or baby blue tips
- Neon French: Electric pink, lime green, or bright orange for summer
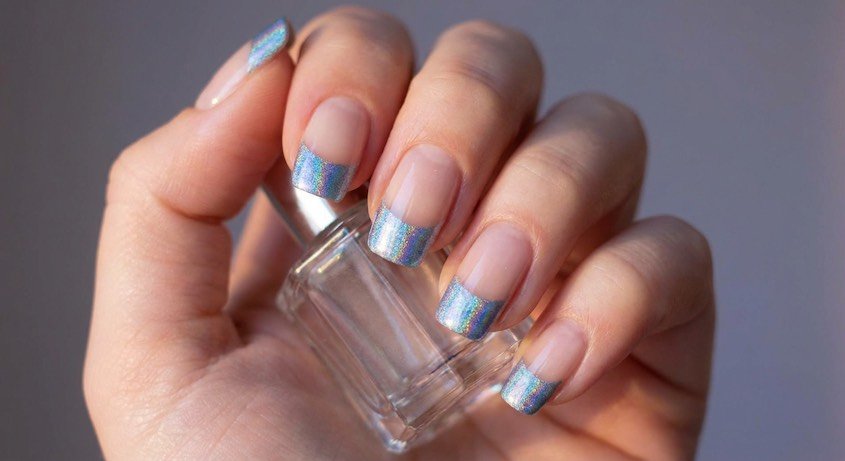
- Metallic French: Gold, silver, or rose gold for special occasions
- Rainbow French: Different colors on each nail for a fun, vibrant look
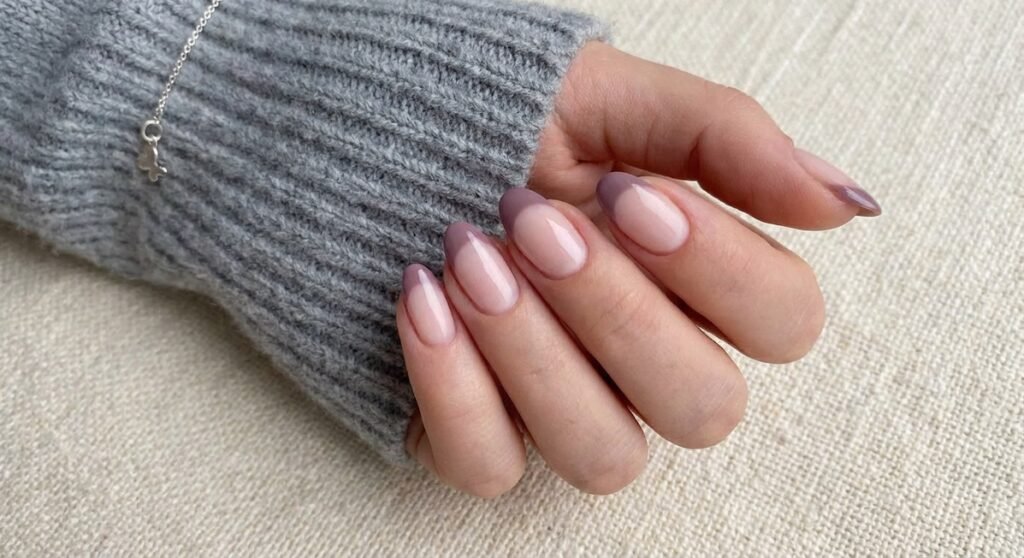
- Ombré French: Gradient effect from base to tip
Reverse French Manicure
This innovative style highlights the moon (lunula) at the base of the nail instead of the tip. To create this look, apply your base color first, then use hole reinforcement stickers or specially designed moon guides to create a perfect half-moon shape at the base. This design works beautifully with contrasting colors or metallic accents.
Double French Manicure
Add an extra line of color between the base and tip for added dimension. This style typically features a thin metallic stripe separating the nude base from white tips, creating an elegant and sophisticated appearance perfect for special events.
Geometric French
Modern nail artists have reimagined the traditional curved smile line with angular, geometric shapes. V-shaped tips, diagonal lines, and asymmetric designs offer contemporary alternatives while maintaining the French manicure’s essential structure.
Professional Techniques and Salon Secrets Behind A Good French Manicure
Professional nail technicians employ several techniques to achieve flawless French manicures consistently. Understanding these methods can help improve your at-home results:
The Three-Stroke Method
Professionals often use a specific three-stroke technique for applying polish: one stroke down the center, followed by one on each side. This method ensures even coverage and minimizes the risk of pooling or streaking.
The Float Technique
For creating perfect smile lines, many technicians use the “float” technique. This involves loading the brush with polish and allowing it to float across the nail surface without applying pressure, creating smooth, even lines.
Custom Blending
Salon professionals often custom-mix base colors to perfectly match each client’s skin tone, creating a truly personalized and natural-looking result.
Maintaining Your French Manicure
A well-executed French manicure can last up to two weeks with proper care. Follow these maintenance tips to extend the life of your manicure:
Daily Care
- Apply cuticle oil daily to maintain nail health and prevent chipping
- Wear gloves when cleaning or doing dishes to protect polish
- Avoid using nails as tools to prevent chips and breaks
- Reapply top coat every 2-3 days to maintain shine and protection
Quick Fixes
Keep a small bottle of your base and tip colors for touch-ups. Minor chips can often be repaired without redoing the entire manicure. For white tips that have yellowed, a gentle buff followed by a fresh coat of white and top coat can restore their brightness.
Troubleshooting Common French Manicure Problems
Uneven Smile Lines
If your freehand lines are consistently uneven, try these solutions:
- Practice on paper first to develop muscle memory
- Use guide strips or tape for consistent results
- Try the dot method: place small dots where you want the smile line to be, then connect them
Yellowing White Tips
Prevent yellowing by:
- Always using a base coat under white polish
- Choosing high-quality white polish with UV protection
- Applying top coat daily to create a barrier against staining
Quick Chipping
Improve longevity by:
- Properly dehydrating nails before application
- Capping the free edge with each coat
- Allowing adequate drying time between coats
- Using thin, multiple coats rather than thick ones
French Manicure for Different Nail Lengths and Shapes
Short Nails
French manicures can look stunning on short nails when proportioned correctly. Keep the white tips very thin – no more than 1-2 millimeters – to maintain balance. Consider using a sheer white for a more subtle effect that won’t overwhelm short nail beds.
Long Nails – French Manicure
Longer nails provide more canvas for creativity. The white tips can be slightly thicker, and you have room to experiment with different smile line shapes. Deep smile lines that follow the natural curve of the nail bed create an elegant, elongating effect.
Different Nail Shapes
- Square: Create straight-across tips that mirror the nail shape
- Round: Follow the natural curve with rounded smile lines
- Almond: Create deeper smile lines that accentuate the tapered shape
- Stiletto: Use dramatic V-shaped tips for edgy appeal
The Future of The French Manicure
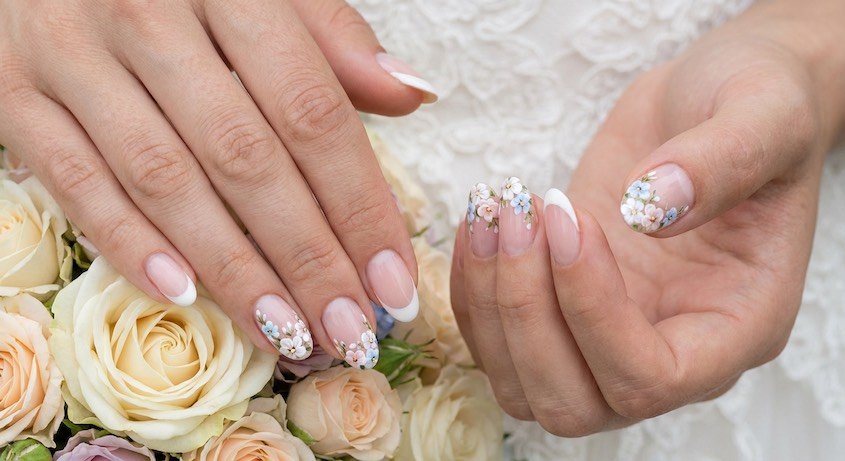
As nail art continues to evolve, so does the French manicure. Current trends include incorporating nail art elements like tiny gems along the smile line, using color-changing polishes for dynamic effects, and combining French tips with other popular techniques like marble or chrome effects. Social media has also popularized micro-French manicures with ultra-thin tips and abstract French designs that play with negative space.
The enduring appeal of the French manicure lies in its versatility and timeless elegance. Whether you prefer the classic white-tipped look or contemporary colorful variations, mastering this technique provides a foundation for endless creativity. With practice, patience, and the right tools, anyone can achieve salon-quality French manicures at home while saving money and expressing personal style.
Remember that like any skill, creating perfect French manicures takes practice. Don’t be discouraged if your first attempts aren’t flawless – even professional nail technicians spent time perfecting their technique. Start with the classic style to master the basics, then gradually experiment with modern variations as your confidence grows. With this comprehensive guide as your reference, you’re well-equipped to embark on your French manicure journey and discover the endless possibilities this timeless style offers.
Want a french manicure at home? Checkout our guide on how to do your own great French Manicure!